

When a container is created, an additional writable layer called the "container layer" substitutes for the filesystem within the container. But all files created within the container will not be persisted on the host. Hence, we use Docker bind mounts and volumes to allow persistence.
"Build Once , Run Anywhere
Seems like we are going to repeat this mantra in each of our posts. Because we just can't stop emphasizing on the importance of it!
Alright let's have a quick recap. In the last episode, (err..last post) our own pet-store application was containerized using Docker. We created the image, spun up a new container and even tested an API.
But we've just scratched the surface... There are a lot of things that we still haven't tackled....Yet.
Consider this. We say that any application can be containerized. But what happens when the application creates files (you know, static files or config files, the usual) Where do these go? And what if we want to access these files?
That's exactly what we're answering in this episode (Post! We meant post). We'll be using our own pet-store docker image that we created in the last post. But in reality you can use any other image. (for e.g. Alpine Linux image will do too simply run docker pull alpine and use that)
Storage in Docker
Imagine your Docker container to be a small world in itself . Or a separate tiny little computer running on your computer (OS will be more apt over here). And like any other computer (or OS), the container also has it own filesystem. Of sorts...
Remember our onion analogy for Docker containers from our previous post?
In summary, everything in Docker is organized in "layers". Basically, A Docker container is a layer of readable images or "layers" stacked on top of each other which is defined in a docker file . This is the basis for storage too.
When a container is created from an image, an additional layer is created called the "container layer" which is writable. And this substitutes for the filesystem within the container. Now, any files that are created within the container are stored on this layer.

To see how the filesystem within a docker container looks like, you can copy the containers file system using the docker cp command.
For example, for our petstore application, we get the container ID using the docker ps command and the copy the file system
docker ps
docker cp <CONTAINER-ID>:/ ./exported
Here, we are exporting the entire filesystem for the container. (ie. the from the root directory)
Our folder looks something like this:
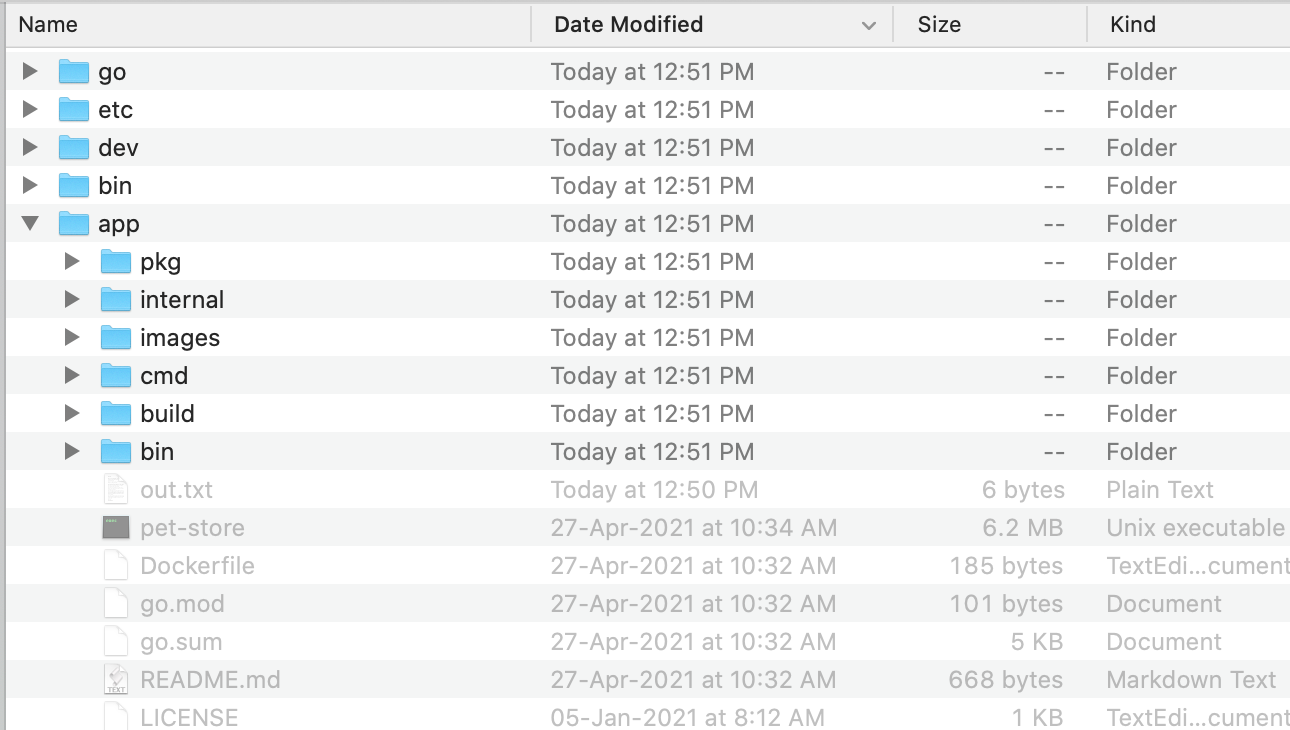
Doesn't it look like any other filesystem on a Linux machine?
But there's a catch here. All files created within the container will not be persisted on the host. Know what that means? As soon as your container is removed....whoosh! All files created by the container are going to vanish with it.
Try it yourself:
- Start the "petstore" container in an interactive manner with the bash shell as the entry point for the container. (Or, if you're running alpine, just replace the name of the image i.e "petstore" with alpine)
docker run -it petstore /bin/bashThis command will take start a new container and open the bash shell in the /app directory, since we had defined our "workdir" as /app in the last post for the petstore image.
- Change to the root directory and check the contents. This is what you'll see:
cd / && ls

- Now, create a simple text file called "out.txt" and list it out
echo "hello" > out.txt && lscat out.txt

When you exit the container by typing the exit command, you won't be able to locate "out.txt". That's because the file was written to the writable layer inside the container and not on the host system.
But what if you want the files to persist on the host system. Or, conversely, what if you want the container to use certain files on the host system.
It can be done of course. Let's find out how.
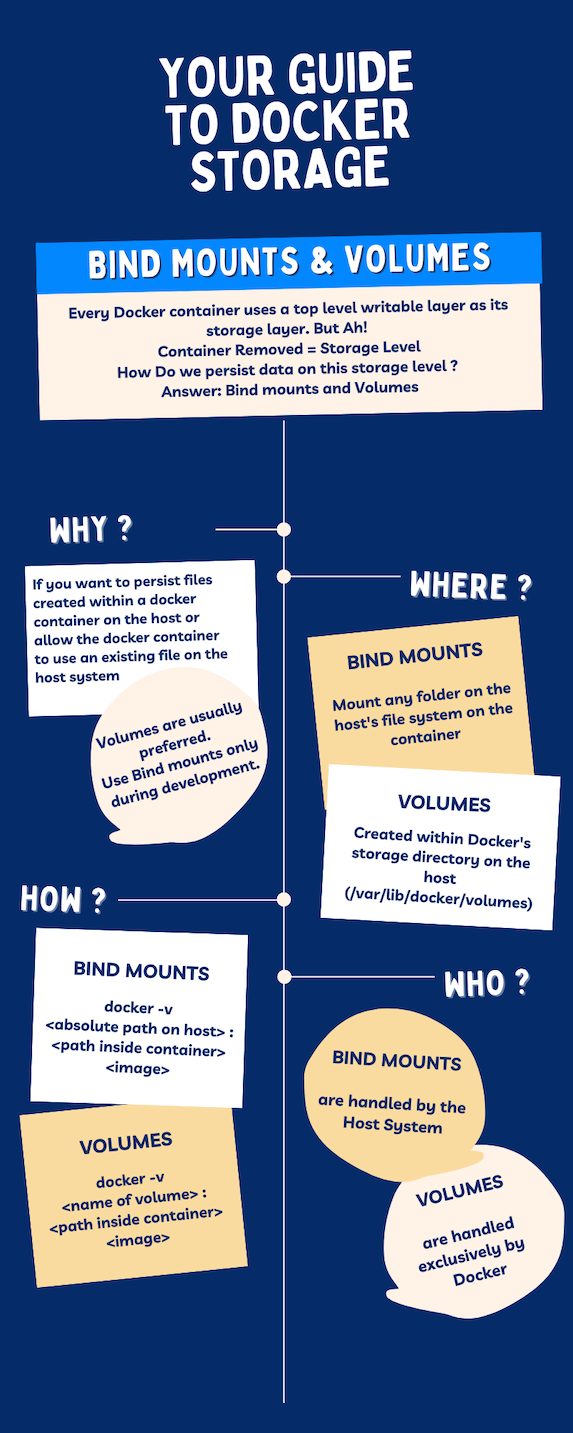
Bind Mounts and Volumes
There are two options to ensure data is persisted on the host even after the container stops; bind-mounts and volumes. Both bind mounts and volumes will allow you to mount any particular directory on the host machine. However, there are subtle differences between the two.
Bind Mounts
In bind mounts, you can take any directory on the host system and mount it in the containers when it runs.
Bind mounts can be created by using the -v flag or the --mount flags to docker run.
-v or --volume consists of two fields, separated by a colon (:).
- For bind mounts, the first field is the absolute path to the file or directory on the host machine.
- The second field is the path where the file or directory is mounted in the container.
docker run -d -v $(pwd):/ <IMAGE>Here, we are mounting the Present Working Directory ("$(pwd)") but you can use any other directory. Just make sure to provide the absolute path though.
--mount accepts its parameters in the key=value format. It is said to be more verbose and usually is the preferred option.
docker run -d --mount type=bind,source=$(pwd),target=/app- Here "type" specifies the type of mount. In our case "bind" for bind mounts
- source specifies the path to the file or directory on the host machine.
- and "target " is the path where the file or directory is mounted in the container.
Let's try out our earlier petstore example using bind mounts:
mkdir mountHost && cd mountHost- Run a new petstore container and open up the bash shell. But here, we mount the present working directory (i.e mountHost) on the a directory called /mountdir within the container
docker run -it -v $(pwd):/app petstore /bin/bash- Once you are inside the container and have the bash shell running. Navigate into the /mountdir folder and create the out.txt file.
cd /mountdir
echo "hello" > out.txt && ls
cat out.txt
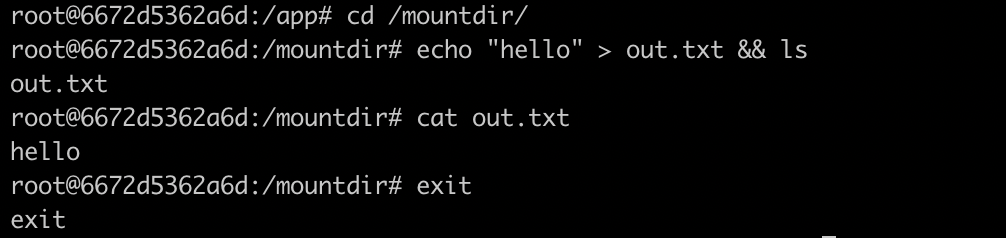
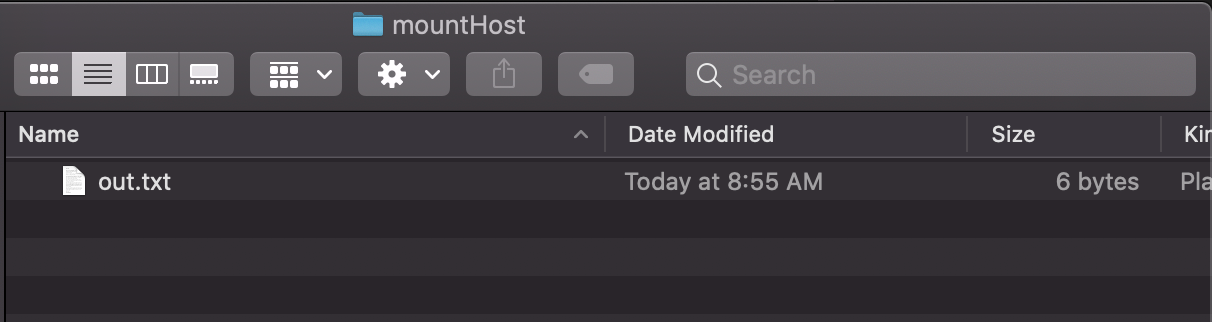
- Exit the container and check the contents of the mountHost directory that you used for the bind mount. Surely, you'll see the out.txt file created there.
Pro Tip
Whenever we change/update a bit of code in our application we need to rebuild the image all over again which can be time consuming. A quick fix is to use bind mounts to achieve a "hot reload" feature (of sorts). Simply mount your code repository's root on the container's workdir. For example for our pet store application, we ran the container bydocker run -d -p 9000:3000 -e DB_HOST=<YOUR-IP-ADDRESS> pet-store
Instead, we add an extra parameter for the bind mountdocker run -d -p 9000:3000 -e DB_HOST=<YOUR-IP-ADDRESS> -v $(pwd):/app pet-store
Now,even if you change your source code, you won't have to rebuild the entire image. Simply restart the container with the bind mount.
Volumes
Bind Mounts are generally only used during development. One reason is that the bind mount is heavily dependent on the file structure of the host OS and can also be controlled by other processes (other than Docker).
Like in our previous example, even if the "mountHost" directory is being used by the docker container, you can still go and create files on that directory
In such cases, volumes are preferred. Here, the directory to be mounted is created inside Docker's storage directory on the host and is completely managed by Docker. For example in Linux, you'll find the volume under "/var/lib/docker/volumes/".
Volume creation, like bound mounts, can again be done using the -v or --mount although with a few differences
docker run -d -v <VOLUME NAME>:/app <IMAGE>In -v we pass the name of the volume as the first field followed by the path where the file or directory is mounted in the container.
docker run --mount type=volume source=<VOLUME NAME> target=/app <IMAGE>Here the type becomes volume and source becomes the name of the volume.
Another thing about volumes is that you can create them even if you are not mounting them on a container.
docker volume create vol1
And inspect the create volume by executing
docker inspect volume vol1
You'll see something like this:
[
    {
        "CreatedAt": "",
        "Driver": "local",
        "Labels": {},
        "Mountpoint": "/var/lib/docker/volumes/volume1/_data",
        "Name": "volume1",
        "Options": {},
        "Scope": "local"
    }
]
Let's try mounting this volume onto our container
docker run -it -v vol1:/mountdir petstore /bin/bashNow repeat the steps to create a new file inside the container and exit
cd /mountdir
echo "hello" > out.txt
cat out.txt
exit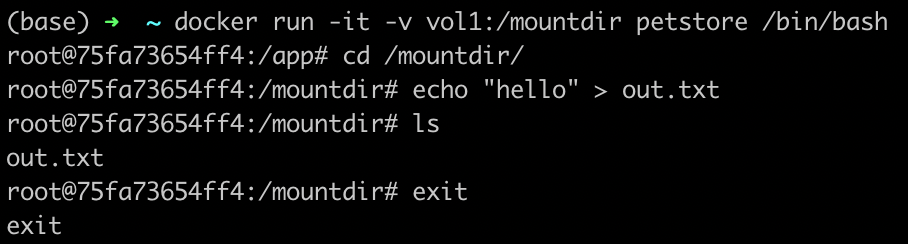
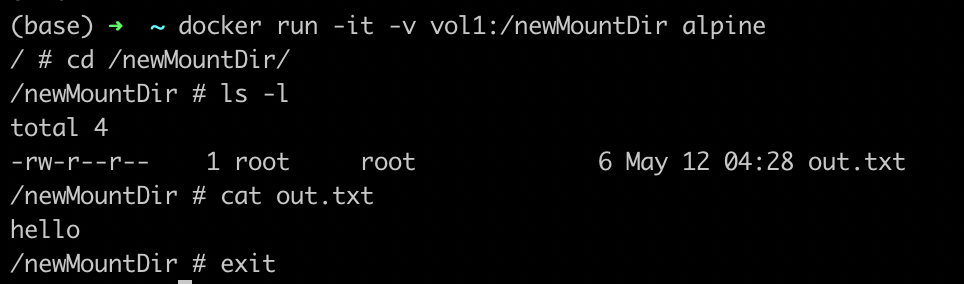
To ensure whether the file was persisted, launch a new container. We'll launch one using the Alpine Linux image and use the same volume but mount it on another directory
docker run -it -v vol1:/newMountDir alpineNow if you list the contents of "newMountDir", you'll find the out.txt file already there
You can even share data between two running containers using volumes. Remember, volumes are handled completely by Docker and therefore are more secure since no other process can write to these volumes
In Summary
There! You have successfully used bind mounts and volumes to ensure data persistence for containers. Both of these will allow you to share data between the container and the host. If you use Linux, you can also use a third type called the tmpfs mount which will use the host's memory instead of the container's writable layer. But here too, the data will not be persisted when the container is removed. Kinda misses the purpose for here right?
But we found a little loophole when using volumes or bind volumes this can cause some security issues. Want to know how? Stay tuned for our next post.


Join the conversation