
What Is a Dockerizing ? Dockerizing is the process of packing, deploying, and running applications using Docker containers.
Our previous blog in the series was like a "starter pack" for you. We talked a lot about containers and finally told you about Docker. If you have taken all that in, it's now time to look at the application side of things. Yep, we are talking code in this post!
Remember this?
The mantra is "Build Once , Run Anywhere"
In today's remote way of working, we have to ensure that the solutions we build will run on any other machine or cloud system irrespective of the hardware specifications. You can't really say "But it works on my machine!"
In this post, we'll try to understand how you can "pack" your application in a container. Quick note; instead of using the word "containerise", we'll be using the word "dockerise" and "docker image" instead of "container image" since we are using Docker. Makes sense, right ??
We are using our petstore application from the microservices series as an example here. The code for the above will be available on our GitHub repository:
https://github.com/gochronicles/petstore/tree/feature/dockerising_petstore
Oh and you'll need to install docker too! Its really easy, just follow the instructions based on MacOS, Windows or Linux Operating Systems.
Okay enough talk, let's get started....
Step 1 - Create a Dockerfile
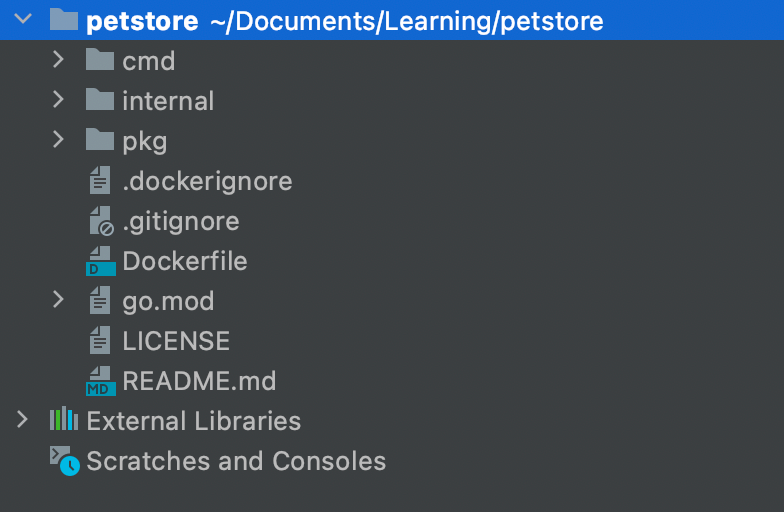
Basic rule of thumb while "dockerising" an app is to add a "Dockerfile" in the application's working directory at the root level . It's just a file that's going to specify "how" the container image should be build. In short, a Dockerfile contains a set of instructions or commands to dockerise the application. Let's create one for our application:
We always like to compare a docker image to an onion. Because it's got "layers" !
Each layer represents a single instruction which needs to be carried out. Simply wrap one layer on top of another and you got yourself an onion! Um...We mean a docker image.
Now, almost all images that you'll build are going use a "base" image. This is the innermost part or the "bulb" of the onion. Its just an existing docker image over which you add extra layers to create your own image.
The selection of the base image depends on the application. Mostly, the base image is the same as the programming language the application is built in. In reality, it's going to be an image consisting of a stripped down version of any Linux OS with the programming language installed.
For our application, we are using the "golang" base image. Our entire docker file looks like this:
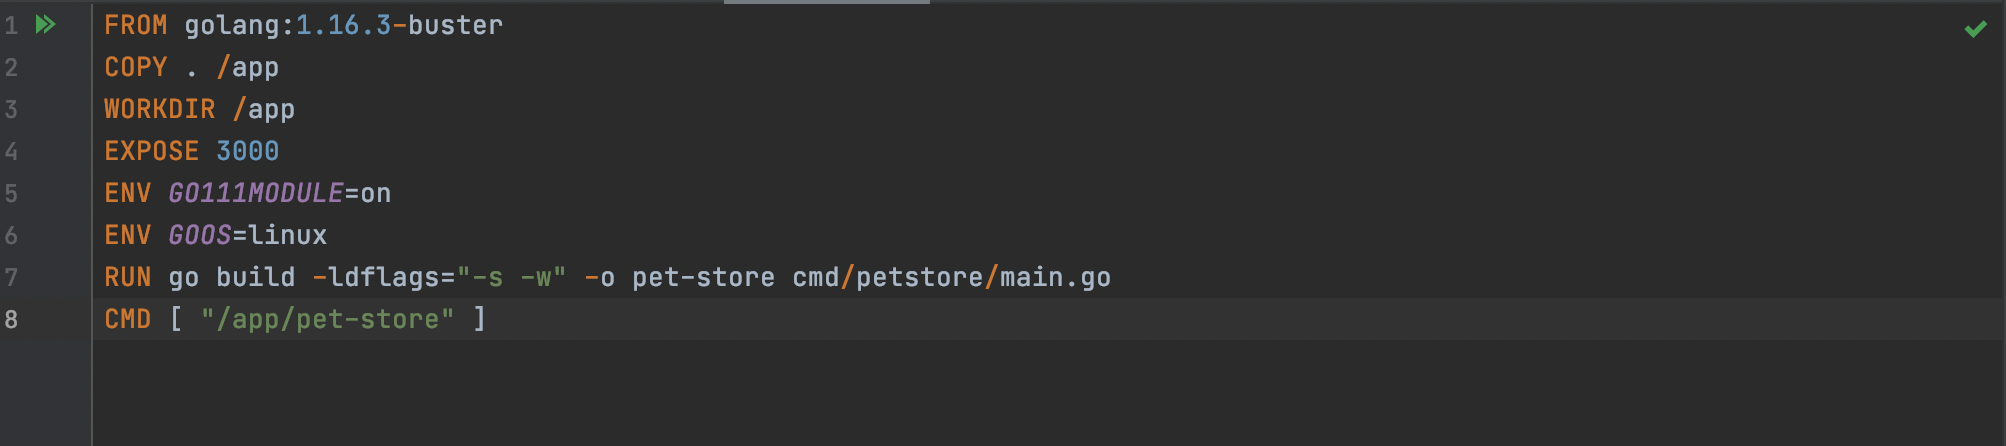
Let's examine it line wise. Each instruction here forms image layer :
FROM
The "FROM" statement is always the first instruction. This is where you specify your base image. For us, its golang: 1.16.3-buster
COPY
This one is going to copy all the contents in your current directory to the directory path "/app" inside your docker image.
WORKDIR
This instruction sets the working directory within the container. So when the container starts, the working directory is automatically changed to /app.
EXPOSE
This exposes the port specified from the container to the host machine. (3000 for us since our application runs on port 3000)
ENV
Env is used to specify any environment variables within the container
RUN
This builds your application with make. You can specify any shell command which you may want to run. In our case, we are building the object file for our application here.
CMD
This specifies the command to run within the container. We are executing the object file we created here. This starts our application web server on port 3000
There's a significant difference between RUN and CMD.
The RUN command will execute once when the image is being built and will be written as a layer.
CMD will be executed whenever the container starts (A container is a running image btw!).
STEP 2 - Build Docker Image
Once the Dockerfile is created the next step is to build a docker image using the docker build command.
docker build -t pet-store .The docker daemon will then look for a Dockerfile in the current directory, unpack each of the layers and execute them serially. The -t option specifies the "tag" or the name you want to give to your image.
As each instruction is examined , Docker looks for an existing image in its cache rather building it again. If you want to turn off the cache use--no-cache=truewhile usingdocker buildcommand
Once this is done, test if the image is built type in docker images command. You'll see your image created in there

STEP 3 - Run a Docker Image as a Container
The final step is to run the docker image as a container using the docker run command
docker run -d -p 9000:3000 -e DB_HOST=<YOUR-IP-ADDRESS> pet-store
Let's break it down:
-drepresents running the docker container as a daemon process or as they say in "detached" mode. Without -d flag, the container is terminated once you quit the terminal. To ensure that the container runs in the background even when the terminal is terminated we use -d flag.-prepresents a port mapping. Here, 9000 represents the port of the host machine which can be a laptop, cloud machine etc . 3000 refers to the docker port which is exposed .DB_HOSTrepresents an environment variable defined in the code base to take PostgreSQL IP for connection. This is sent with the-eoption
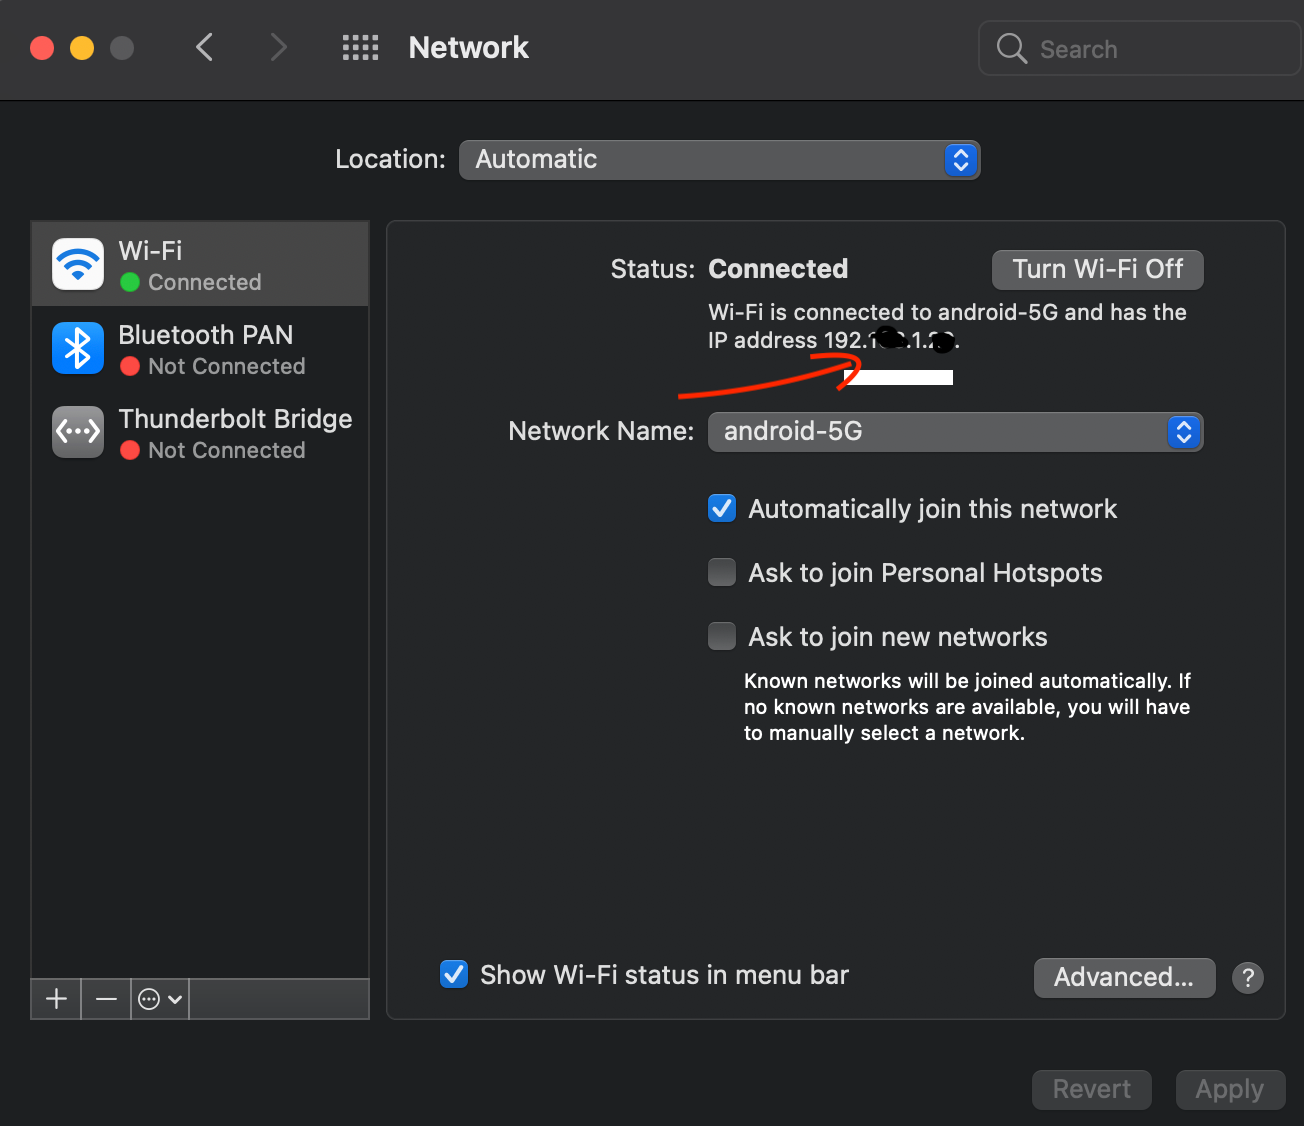
Remember , any outgoing networking connection from a container needs a proper IP even if it is in the same local machine. In our case DB_HOST IP is same as the one which is shown in the Wifi properties.
pet-store should be run with an environment variable DB_HOST exposing the docker port of 3000 to the host machine port which is 9000 in a background processPRO TIP
Try to use environment variables so that dynamic values can be given at runtime. Also , try to use it judiciously. Not all constant variables in the code should be given as environment variables.
Once the command executes successfully you can see the running container with the following command
docker ps -a
You can even see the logs of the container
docker logs -f <CONTAINER-ID>We have now dockerised our pet-store application which can be run on any machine which supports docker. This can be in a local machine or any cloud instance. Run the same set of API's which we ran for pet-store application and nothing changes.
Spend some time experimenting with this file as this is the most important concept before proceeding to any cloud paradigm.
Some Recommendations while using the Dockerfile
- Create containers that can be stopped and destroyed with minimum setup and configuration
- Use .dockerignore - Exclude files which are not necessary while building an image e.g

- Leverage build cache
- Use an alpine image whenever possible as it is small in size and tightly controlled.
- Split long and complex run commands by using backslash and entering it in a new line
Docker image variants
Notice we used something called as golang-1.16.3-buster as our base image. You may even come across terms like alpine, stretch, slim etc. What's with these names?
The 1.16.3 stands for the golang versions and the suffix after this is the image variant which tells you a bit about the base image used in the variant. (The de facto image doesn't have any suffix. ) Here is a list of variants:
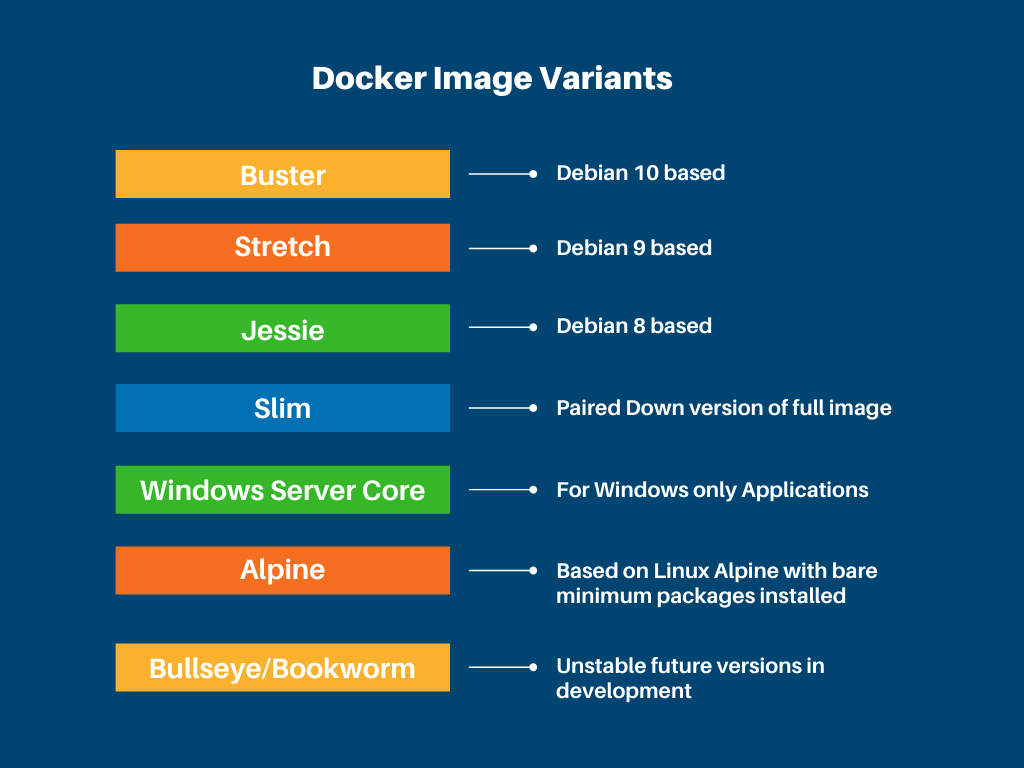
Usually, the slim and alpine images are smaller in size because they are stripped down versions where only the bare minimum packages are installed. However, they are harder to debug and not always easy to use.
Summary
Docker is a really great way of containerising your applications. And to be honest its so popular, there's no escaping this! But well.... it has its flaws too. Maybe the biggest issue still prevalent in Docker is related to security
Docker runs with root user privileges. Now that can a problem that can lead to disaster. If some nasty hacker out there gets his hands on any of the containers, its basically a mayday situation. Want to know why? Or maybe how to prevent this ? All we can say is : Stay tuned for the next post !


Join the conversation