In this post, we guide you through the process of setting up clusters on GCP and installing Devtron to run CI/CD pipelines.
In our last post, we introduced you to this new tool call Devtron. In short, if you want to deploy your applications on Kubernetes then Devtron might be the answer for you. It's simple, with no complex yaml files to maintain and no extra code. Do everything via the UI.
We just told you about it. But how about bringing it to reality? In this post, (and the next) we are going to go hands-on with Devtron. We'll get our environments ready, install and set up Devtron, and finally deploy a simple application.
This post will only focus on getting everything up and going. So let's get started!
What We'll Need
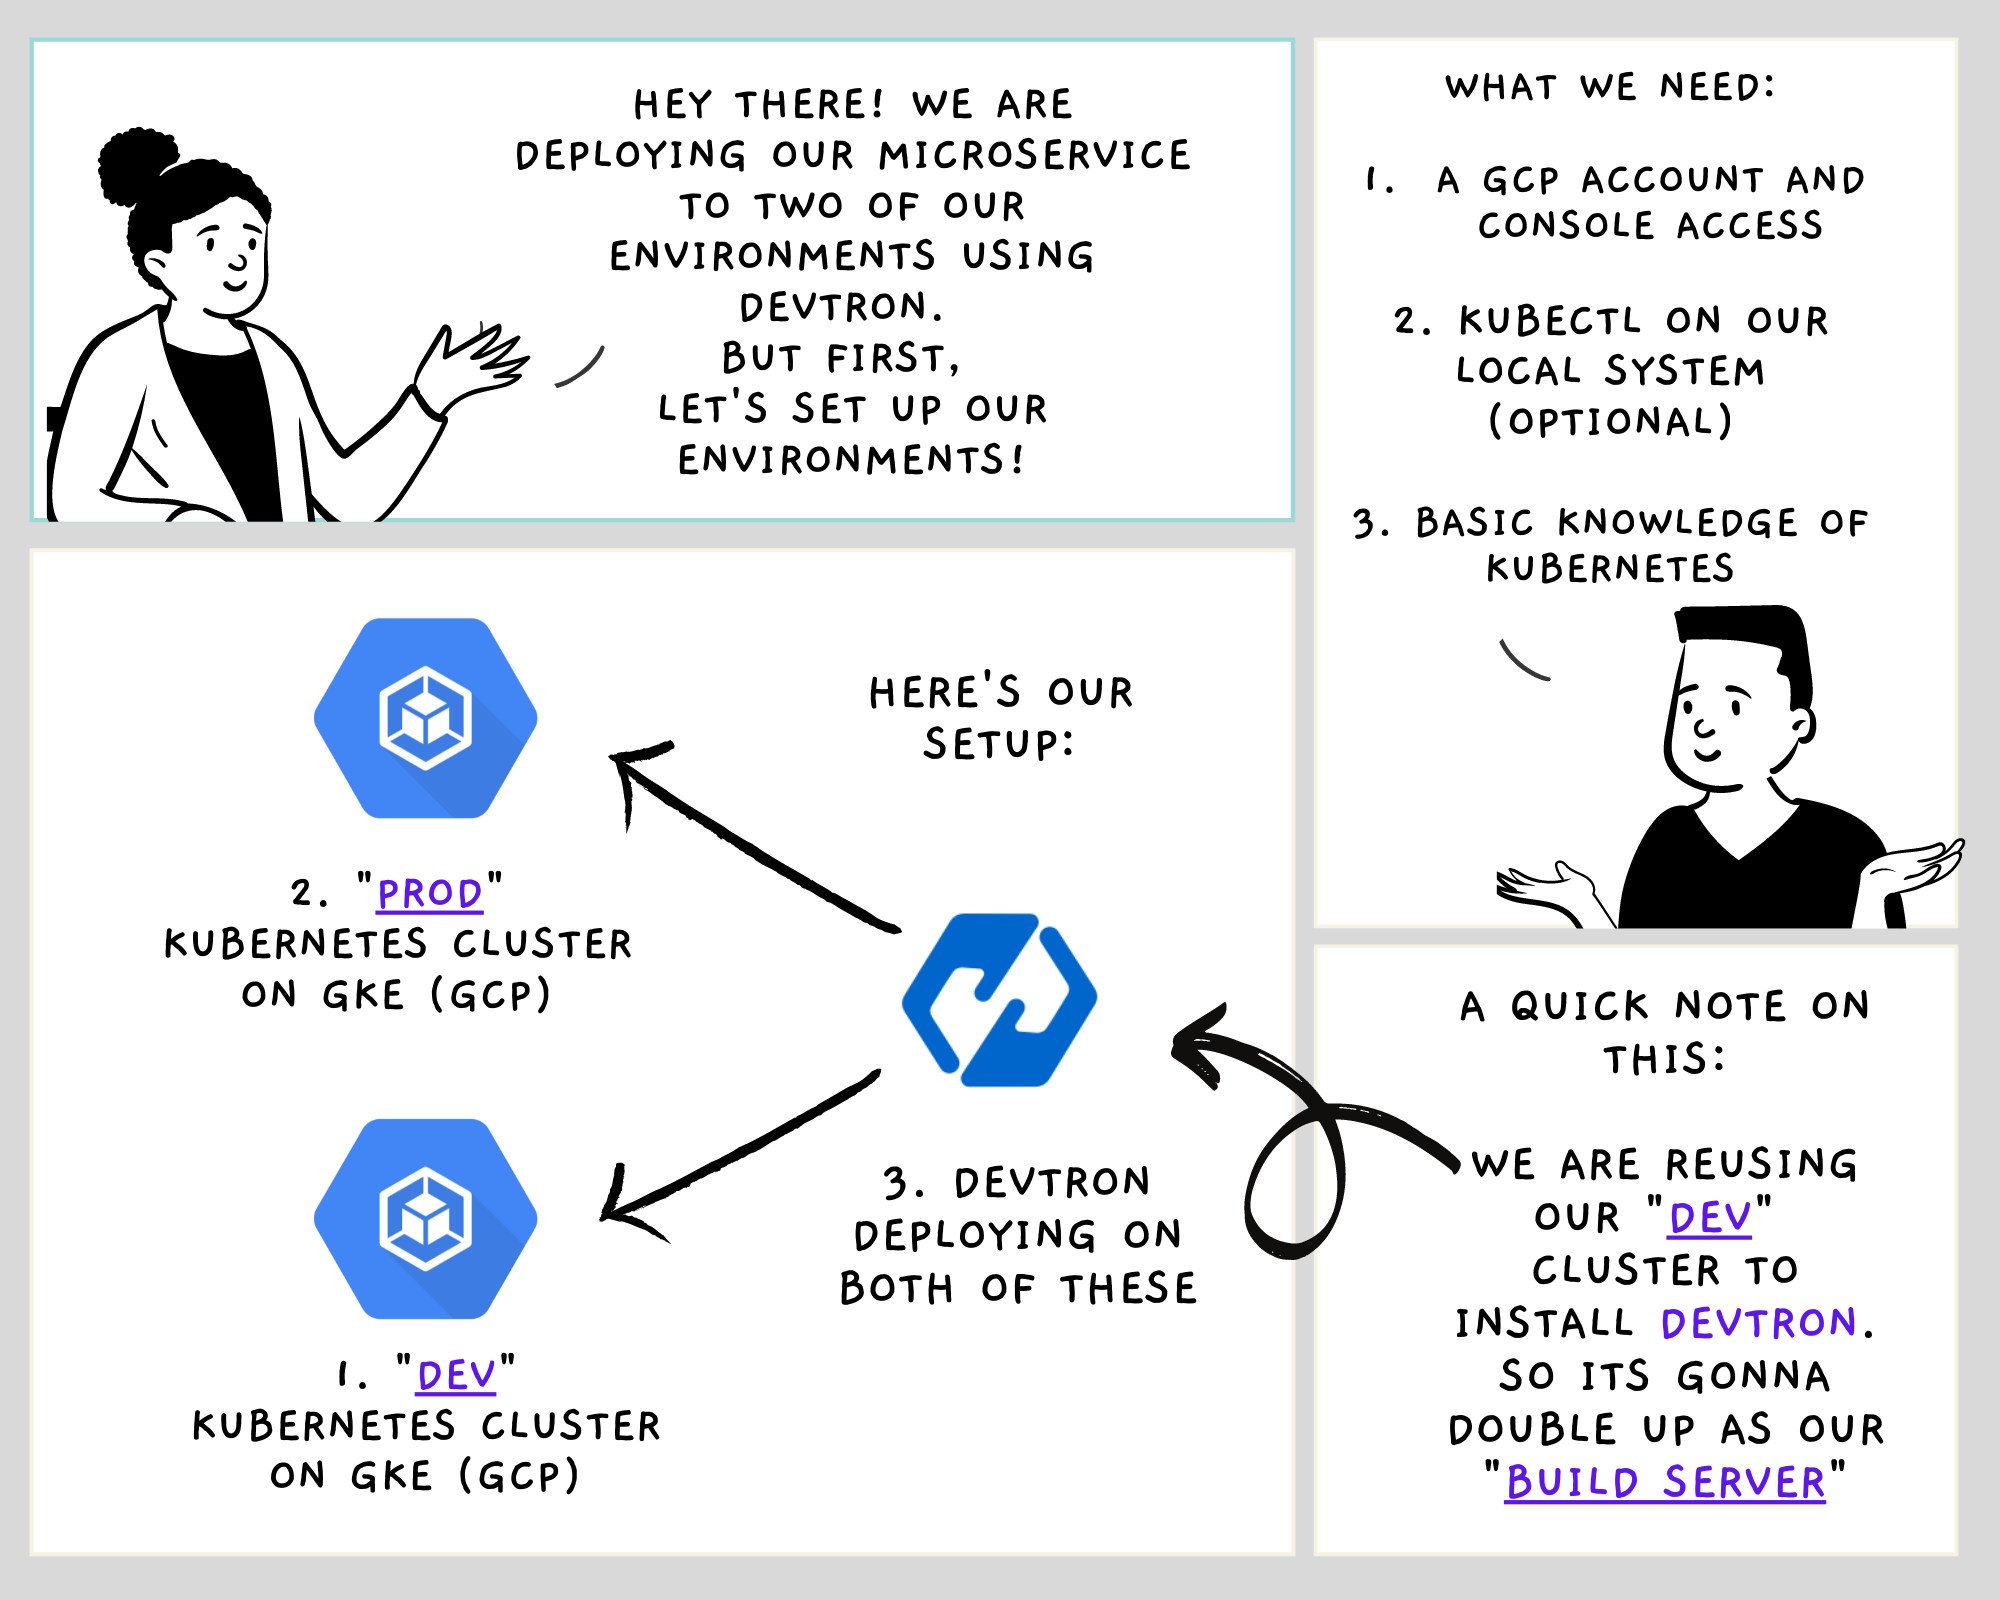
Industry-standard deployments take place in "stages". So, your application will never be instantly used by the consumer. Instead, it going to pass through a series of quality checks before it makes the cut.
Generally, you have independent environments for this:
- The "dev" environment where the developers will test their newest patch of code. Beware, this one is highly unstable
- The "QA" or the "integration" environment mostly used by the Quality Assurance teams to thoroughly test out the new features/fixes coming in.
- And the "prod" environment. This comes with a "Don't mess with me "sign. Well, because it's going to be used by the end-users. That's why it has to be extremely stable and should never break. Ever!
Get it? Good! With that, let's get on with our scenario.....
Step 1: Setting up the Dev Cluster
The dev environment setup goes first. We have to create a Kubernetes Cluster using GKE. It's simple really...
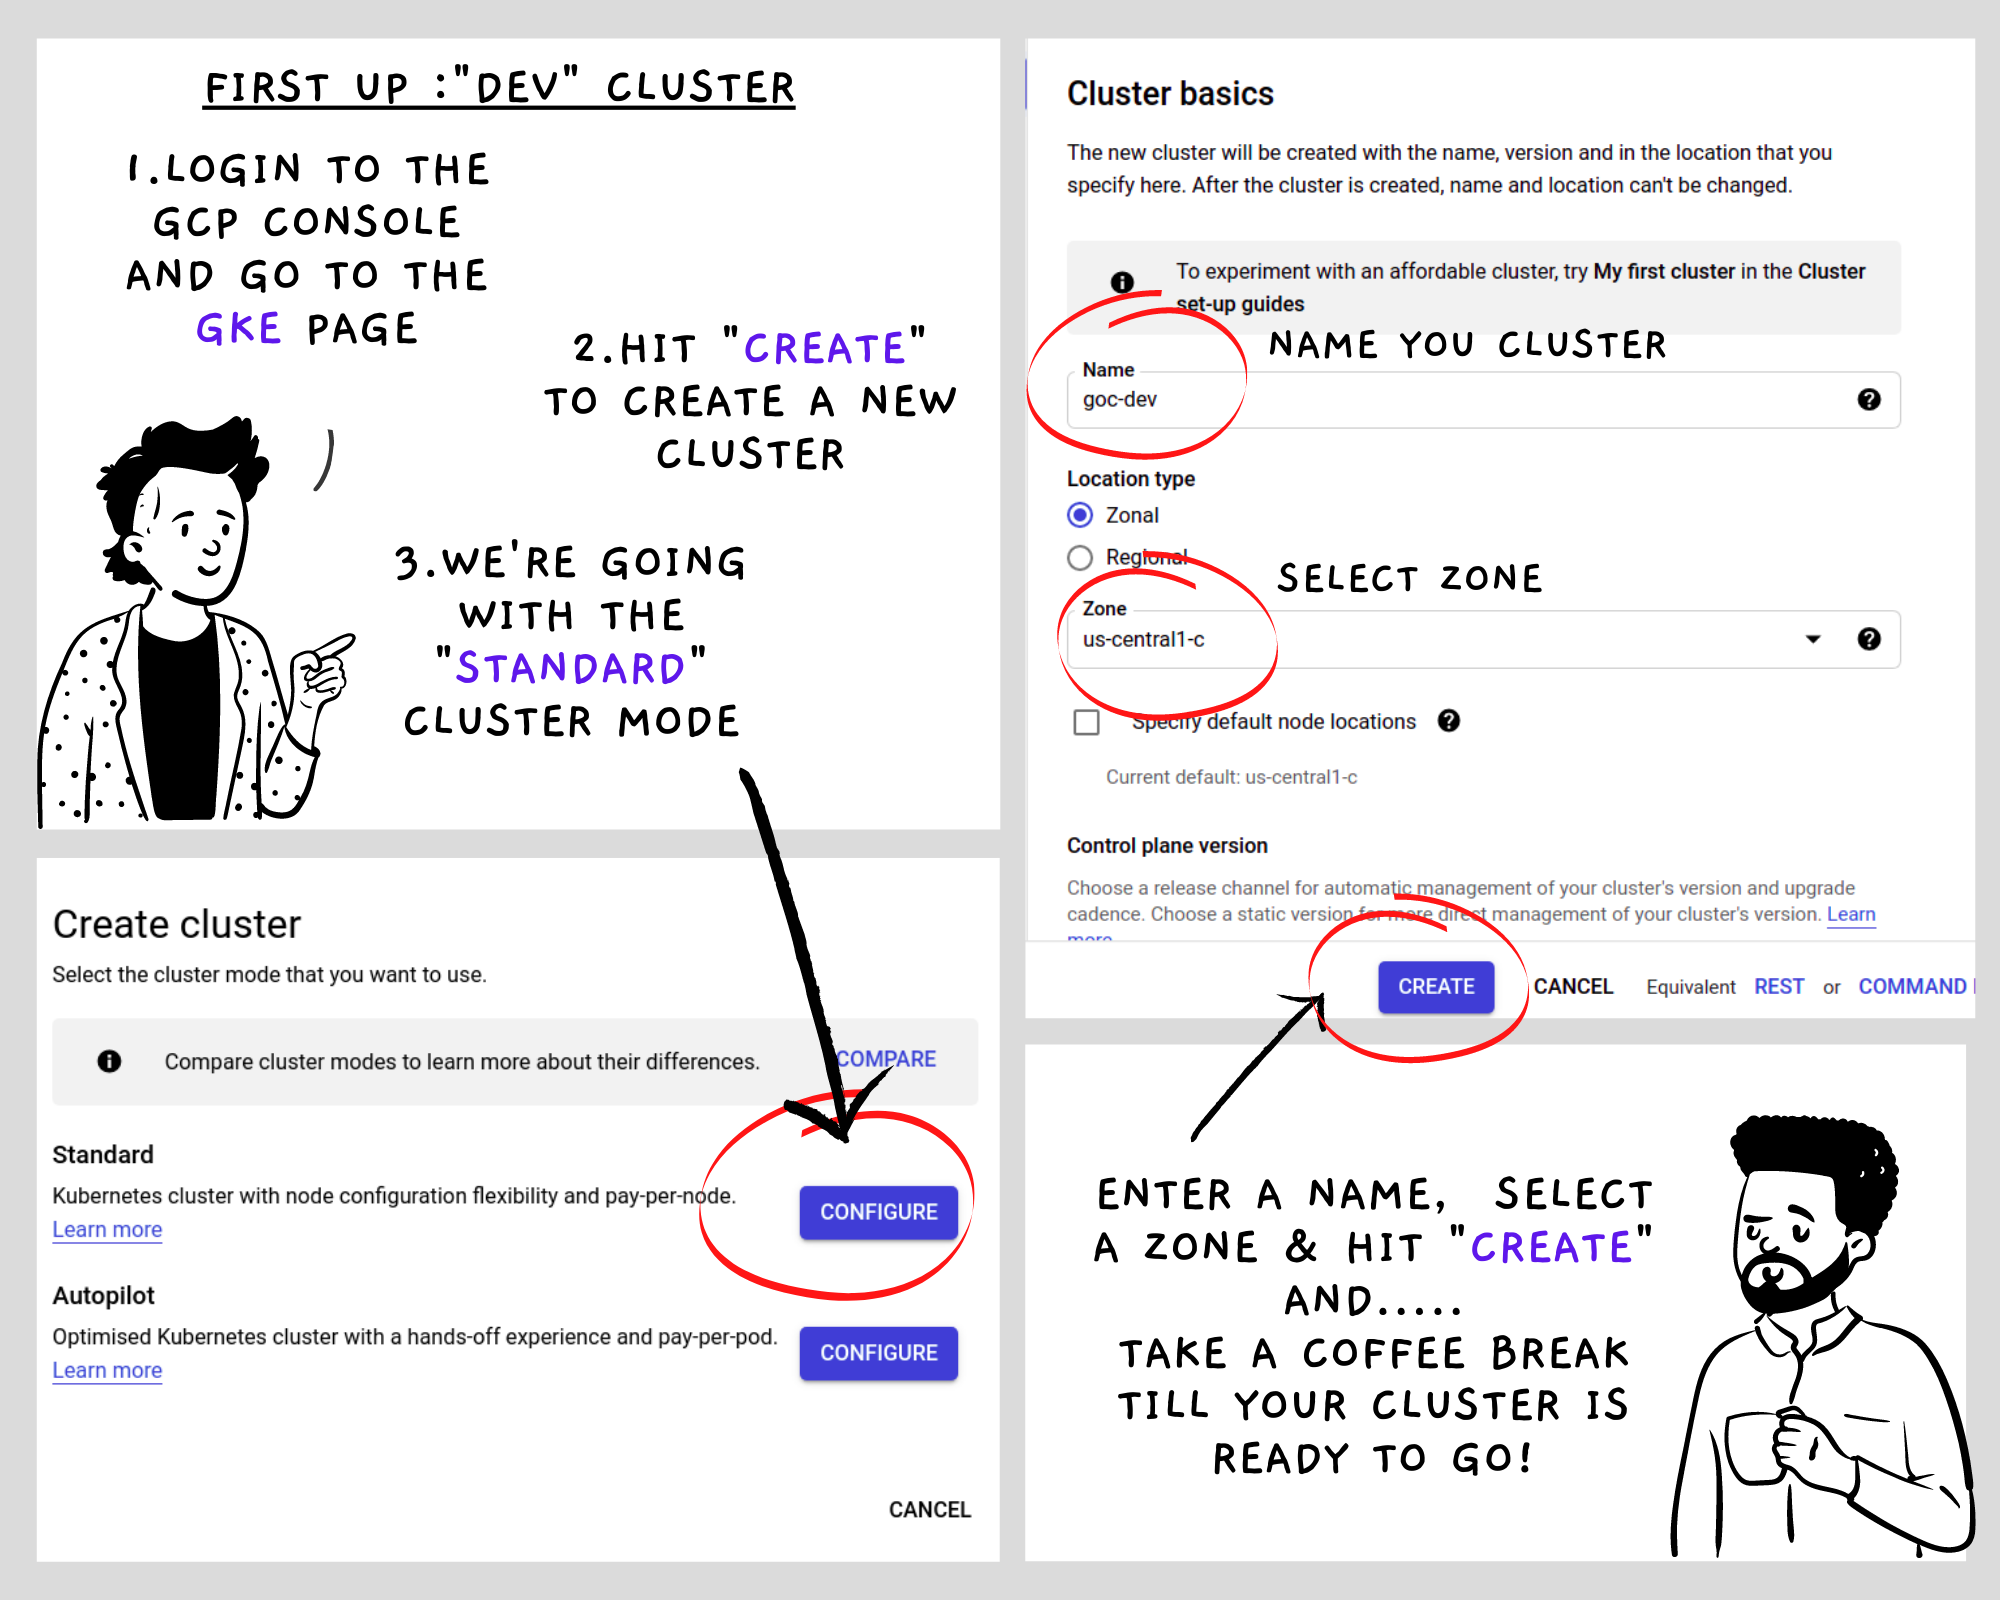
Once we have the cluster running, all we have to do is connect to it. Now you got two options. Connect from your local system by installing and setting up gcloud along with kubectl.
Or if you want to avoid the hassle, just use Google's Cloud Console!
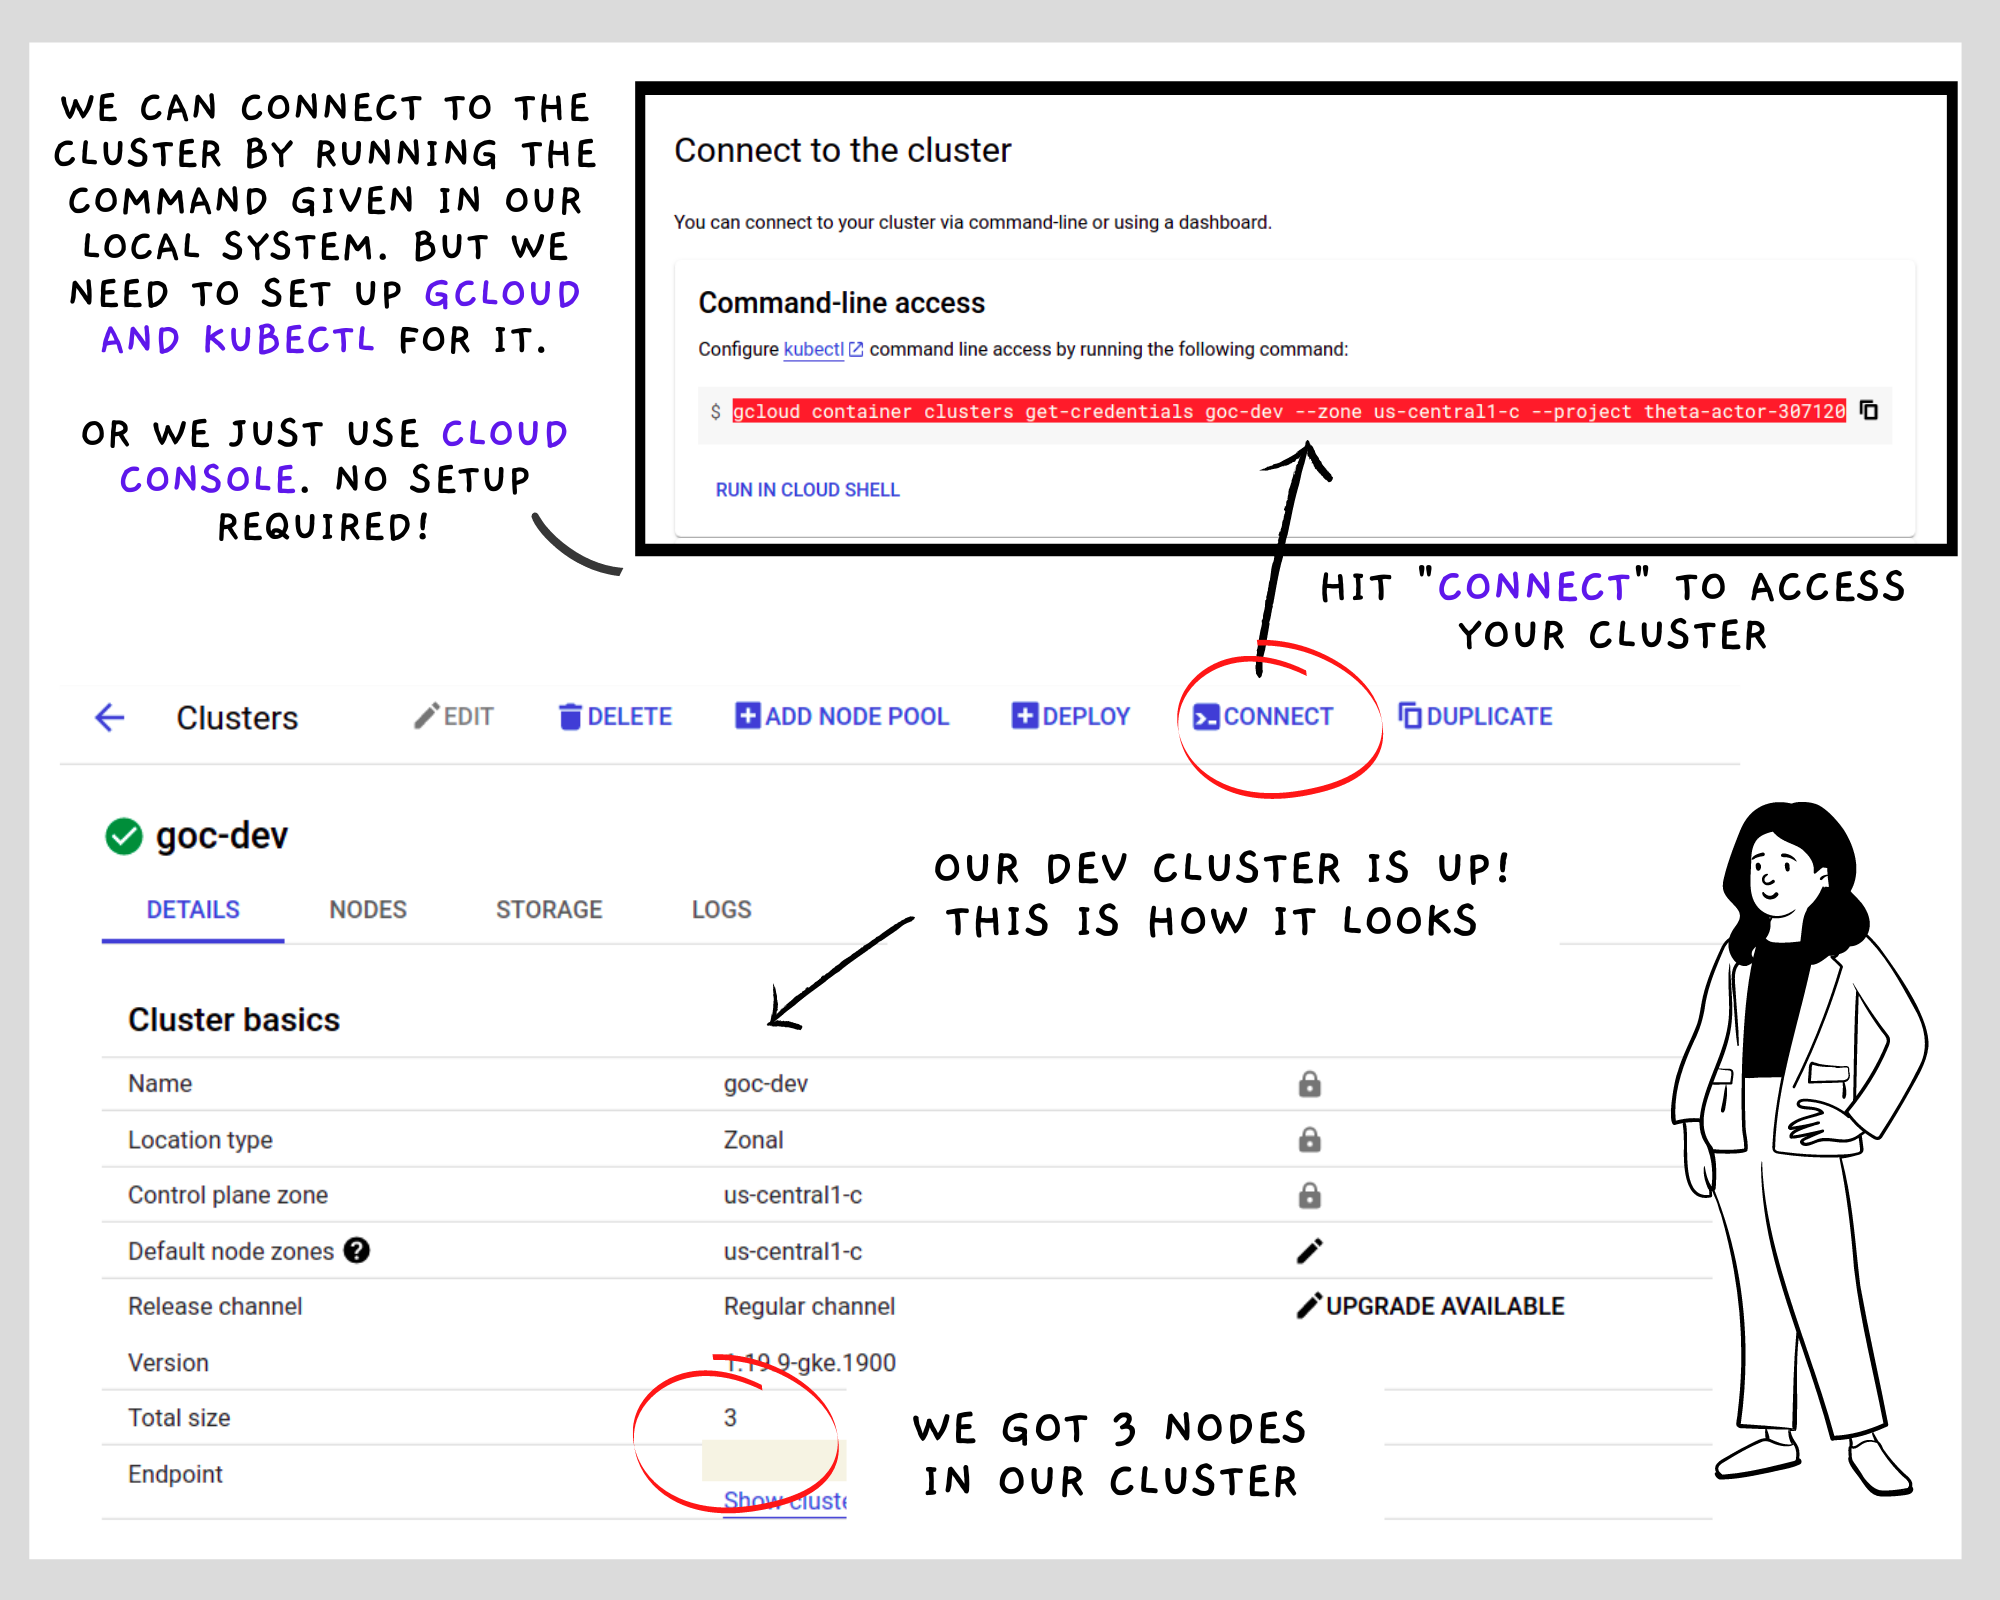
There, our cluster is up and running. Next, we install Devtron
The prod cluster is created in the exact same manner. We're skipping the prod cluster creation. Consider it as a little exercise you'll have to do yourself
Step 2: Installing Devtron
Devtron can be installed using either Helm or Kubectl. We'll go with kubectl. Here's a handy script for installing devtron using kubectl
With this script, installing Devtron is super easy. But it's going to take some time.
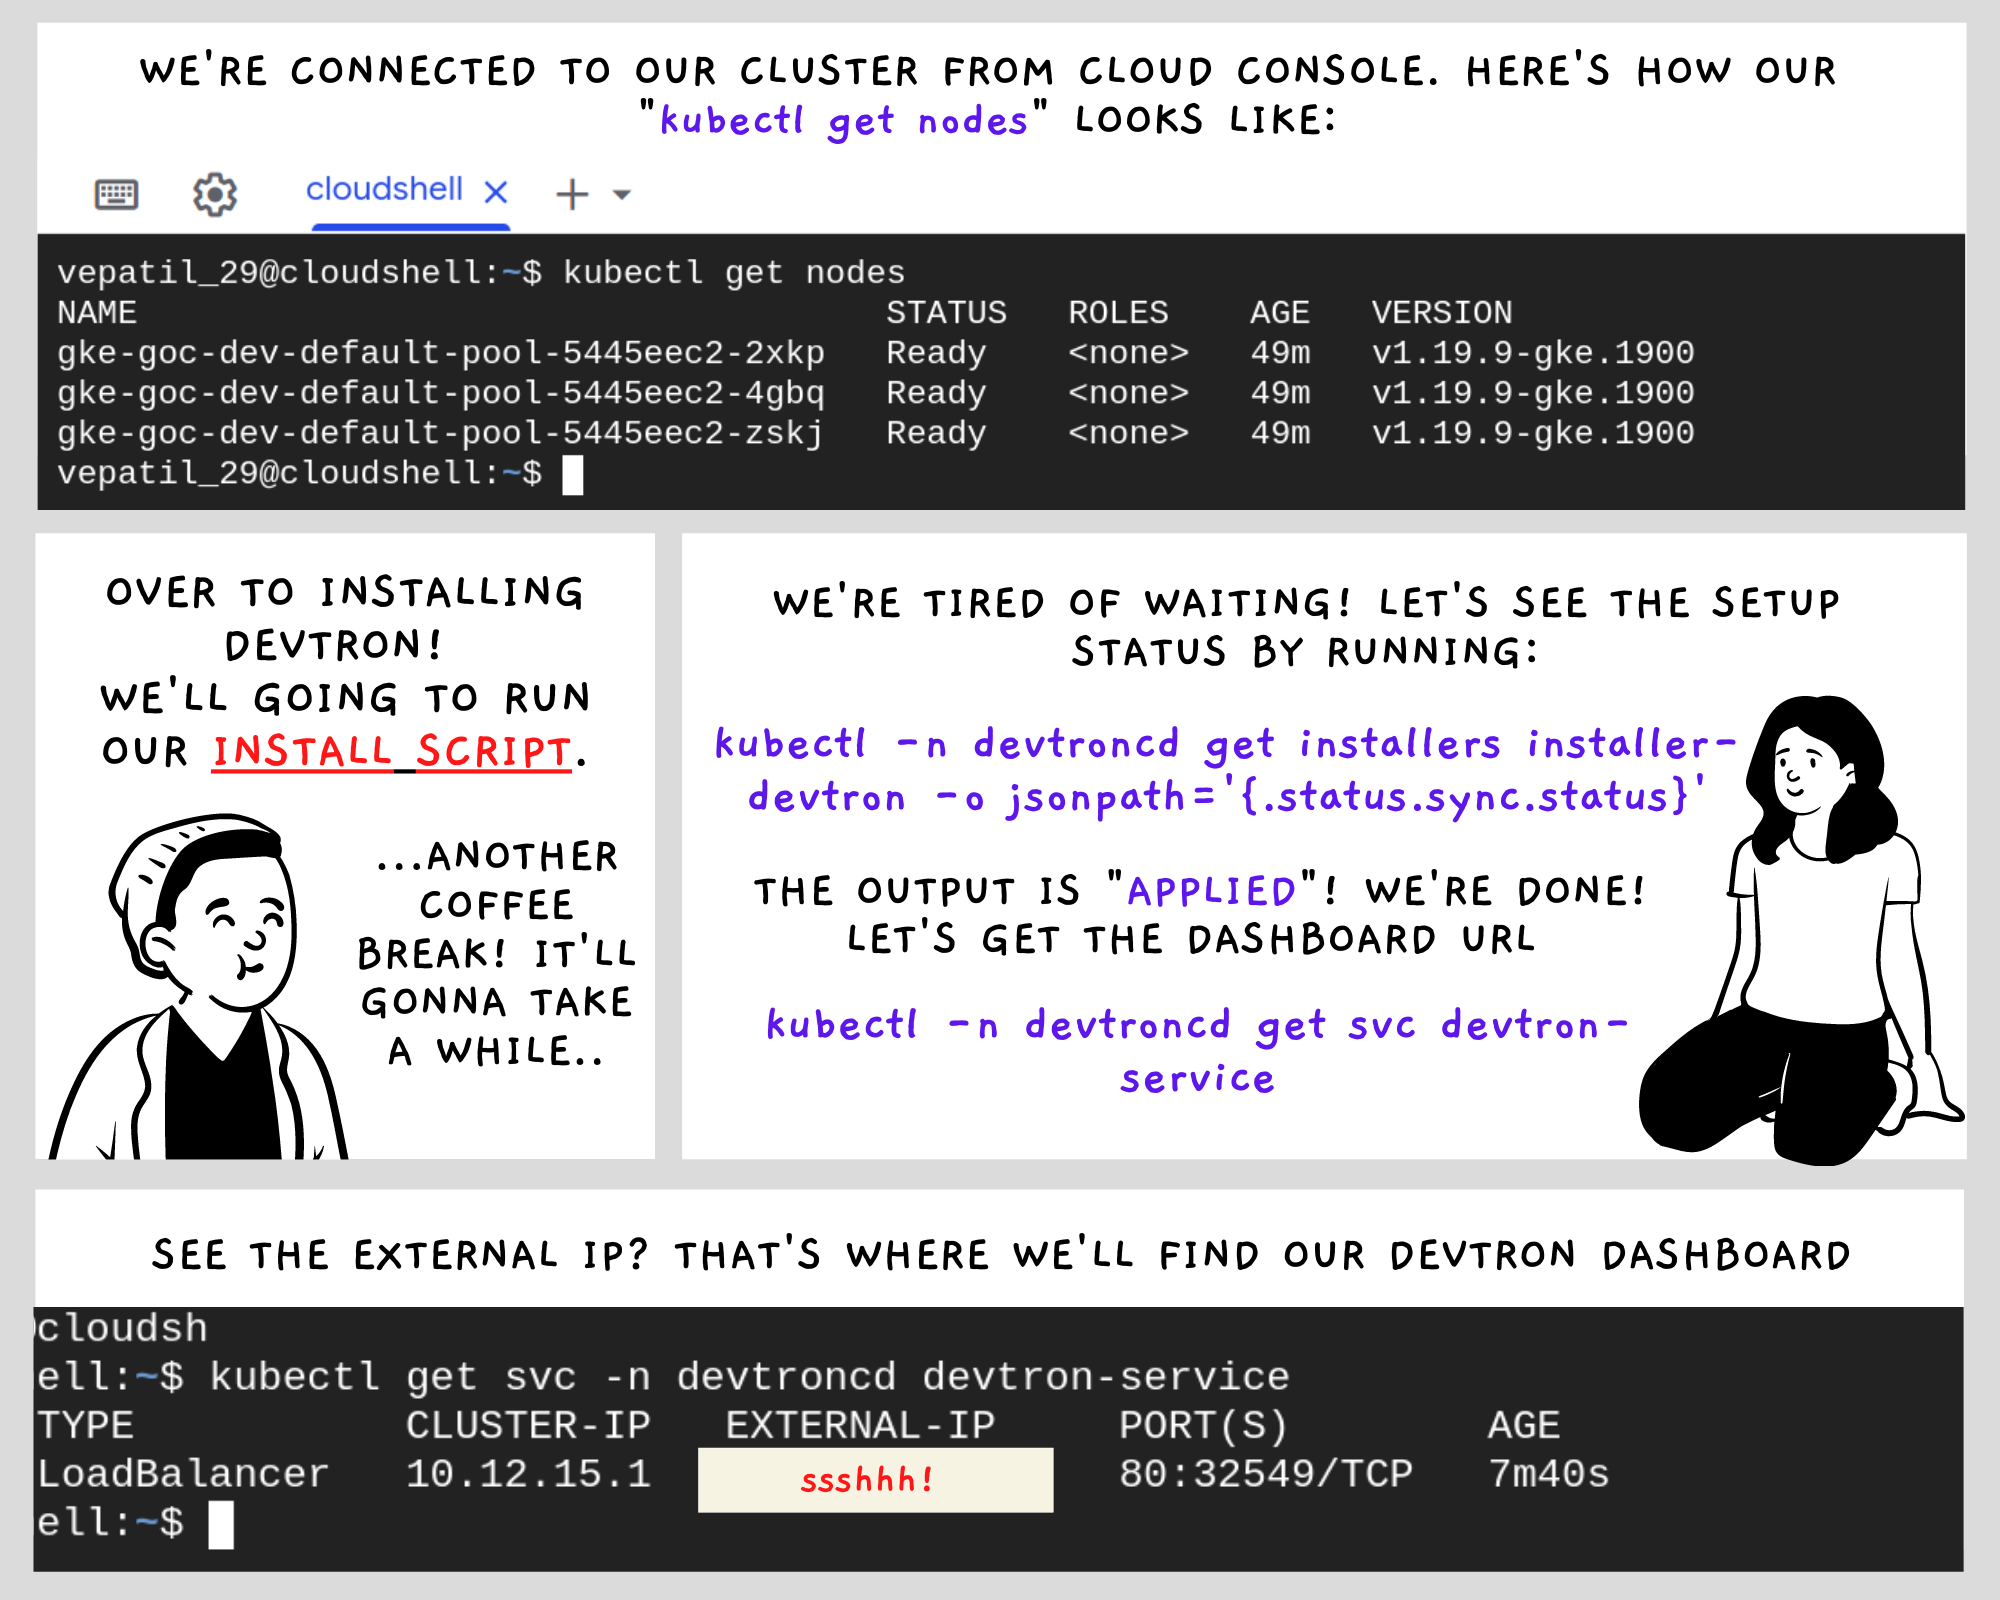
The installation status can be found by running:
kubectl -n devtroncd get installers installer-devtron -o jsonpath='{.status.sync.status}'Once the installation is done, we can easily locate the IP or the hostname of the Devtron dashboard (or UI) with:
kubectl get svc -n devtroncd devtron-service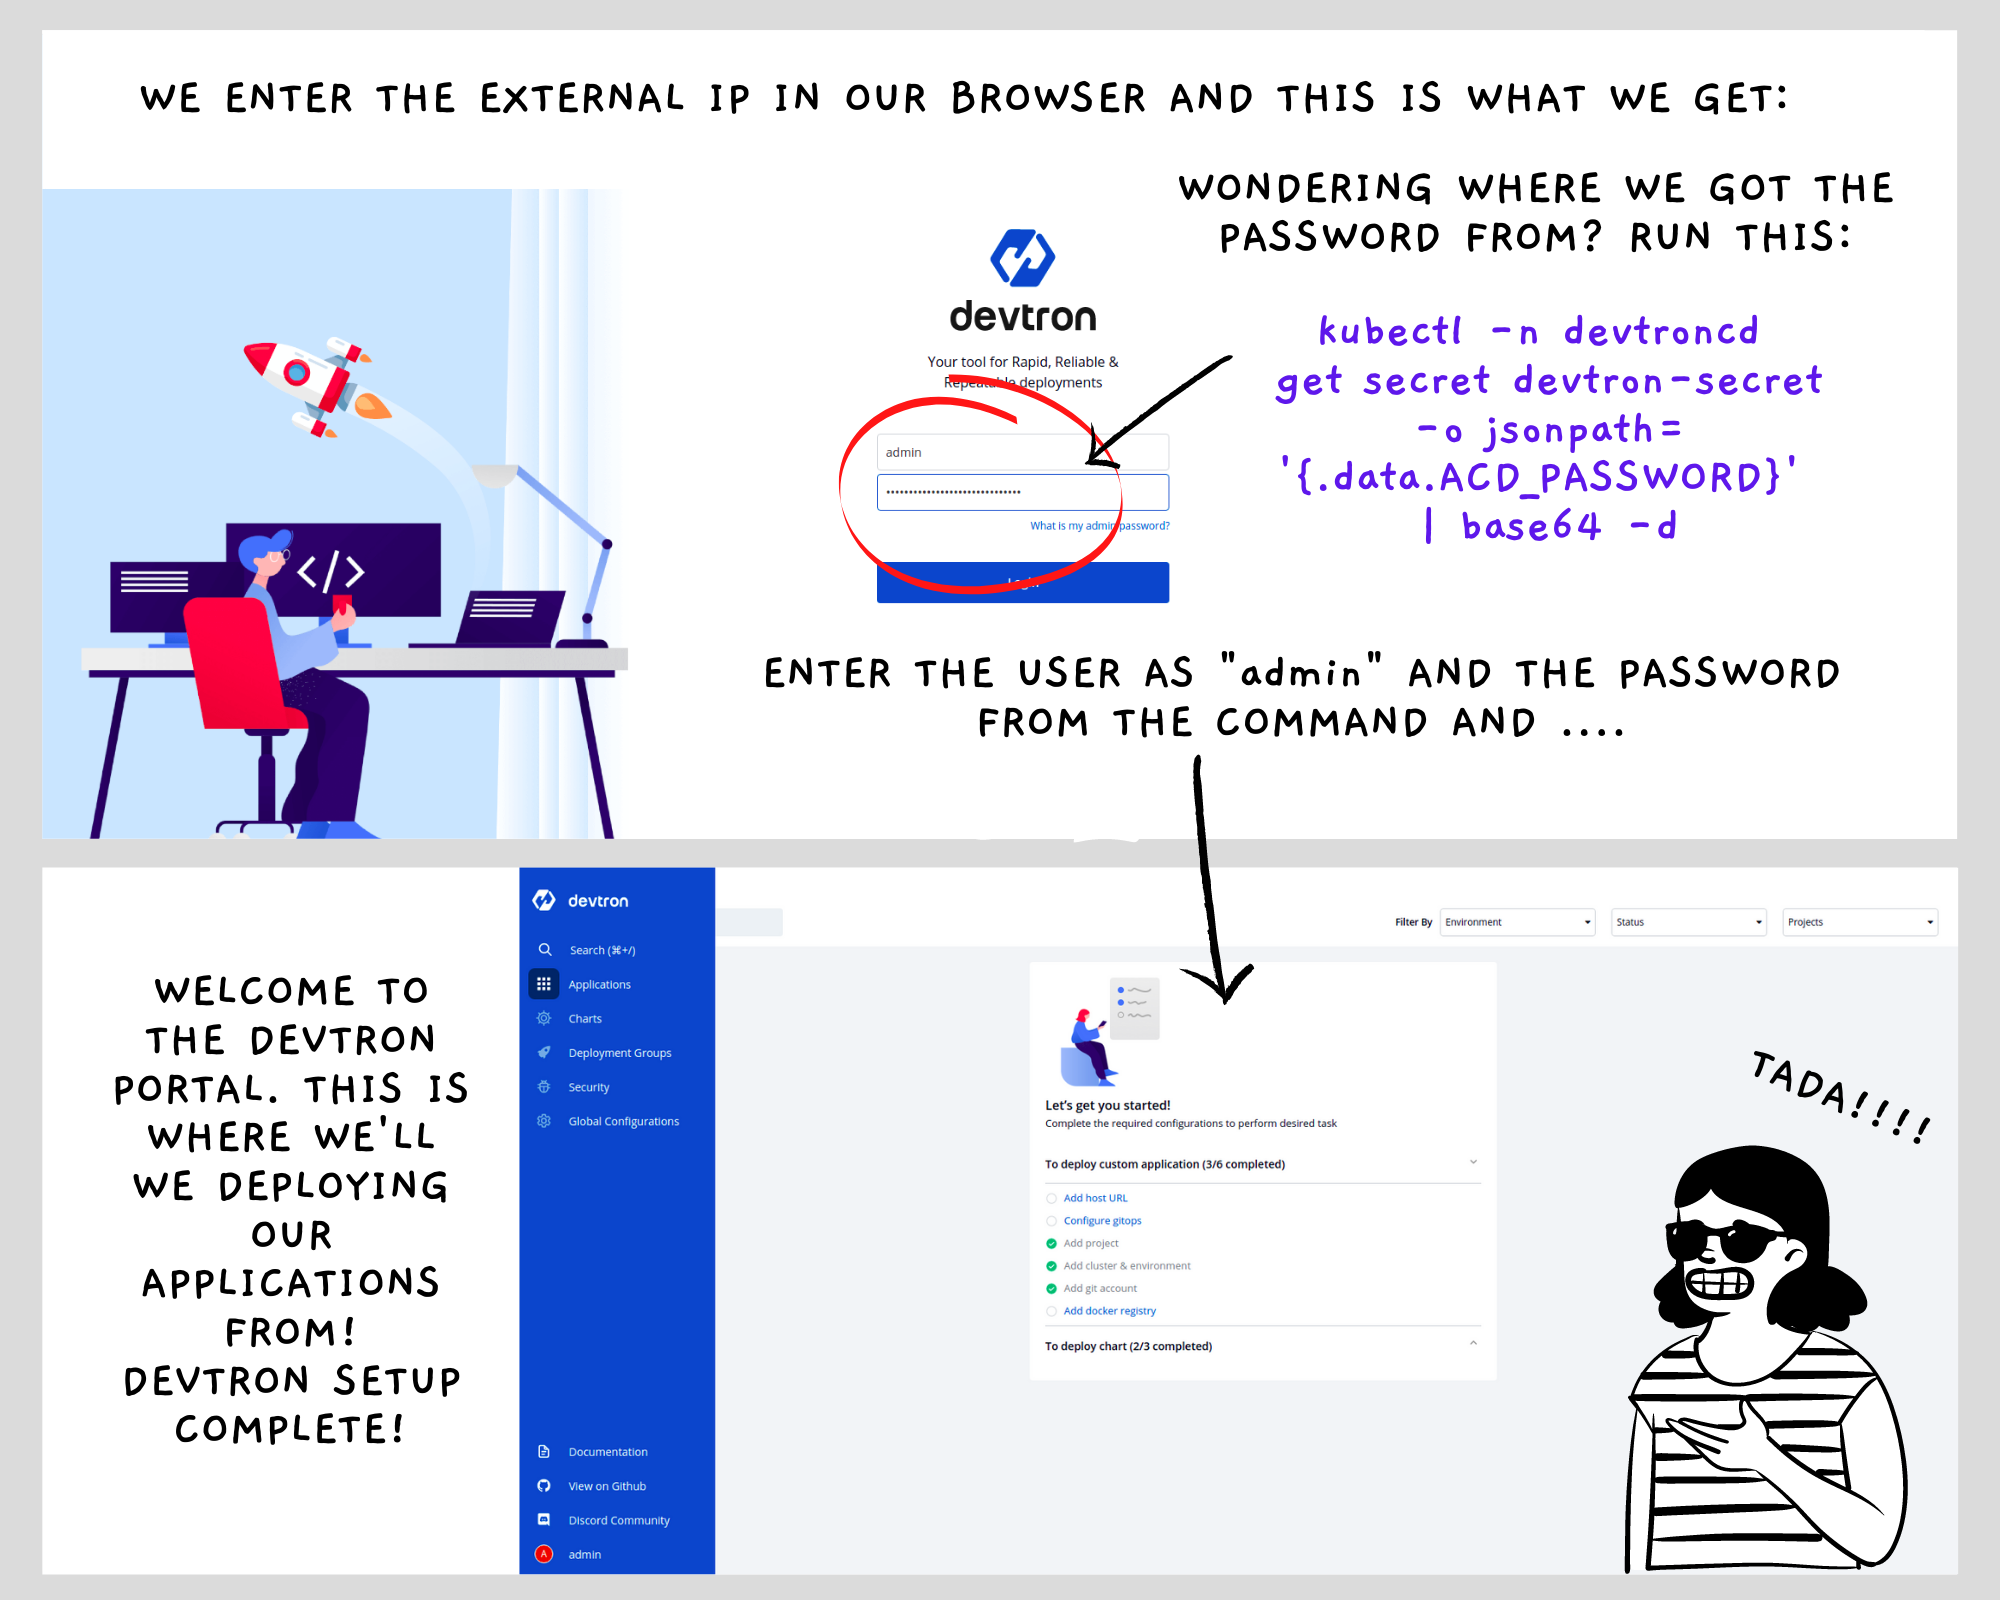
To get the admin credentials for the dashboard, run:
kubectl -n devtroncd get secret devtron-secret -o jsonpath='{.data.ACD_PASSWORD}' | base64 -dDevtron is ready to deploy our applications! But wait, there's this tiny little step you need to perform before that.
Step 3: Install Nginx Ingress Controller
For microservice-based applications, devtron uses the Nginx Ingress Controller. We decided to use the bare-bones approach to install the Nginx controller via kubectl.
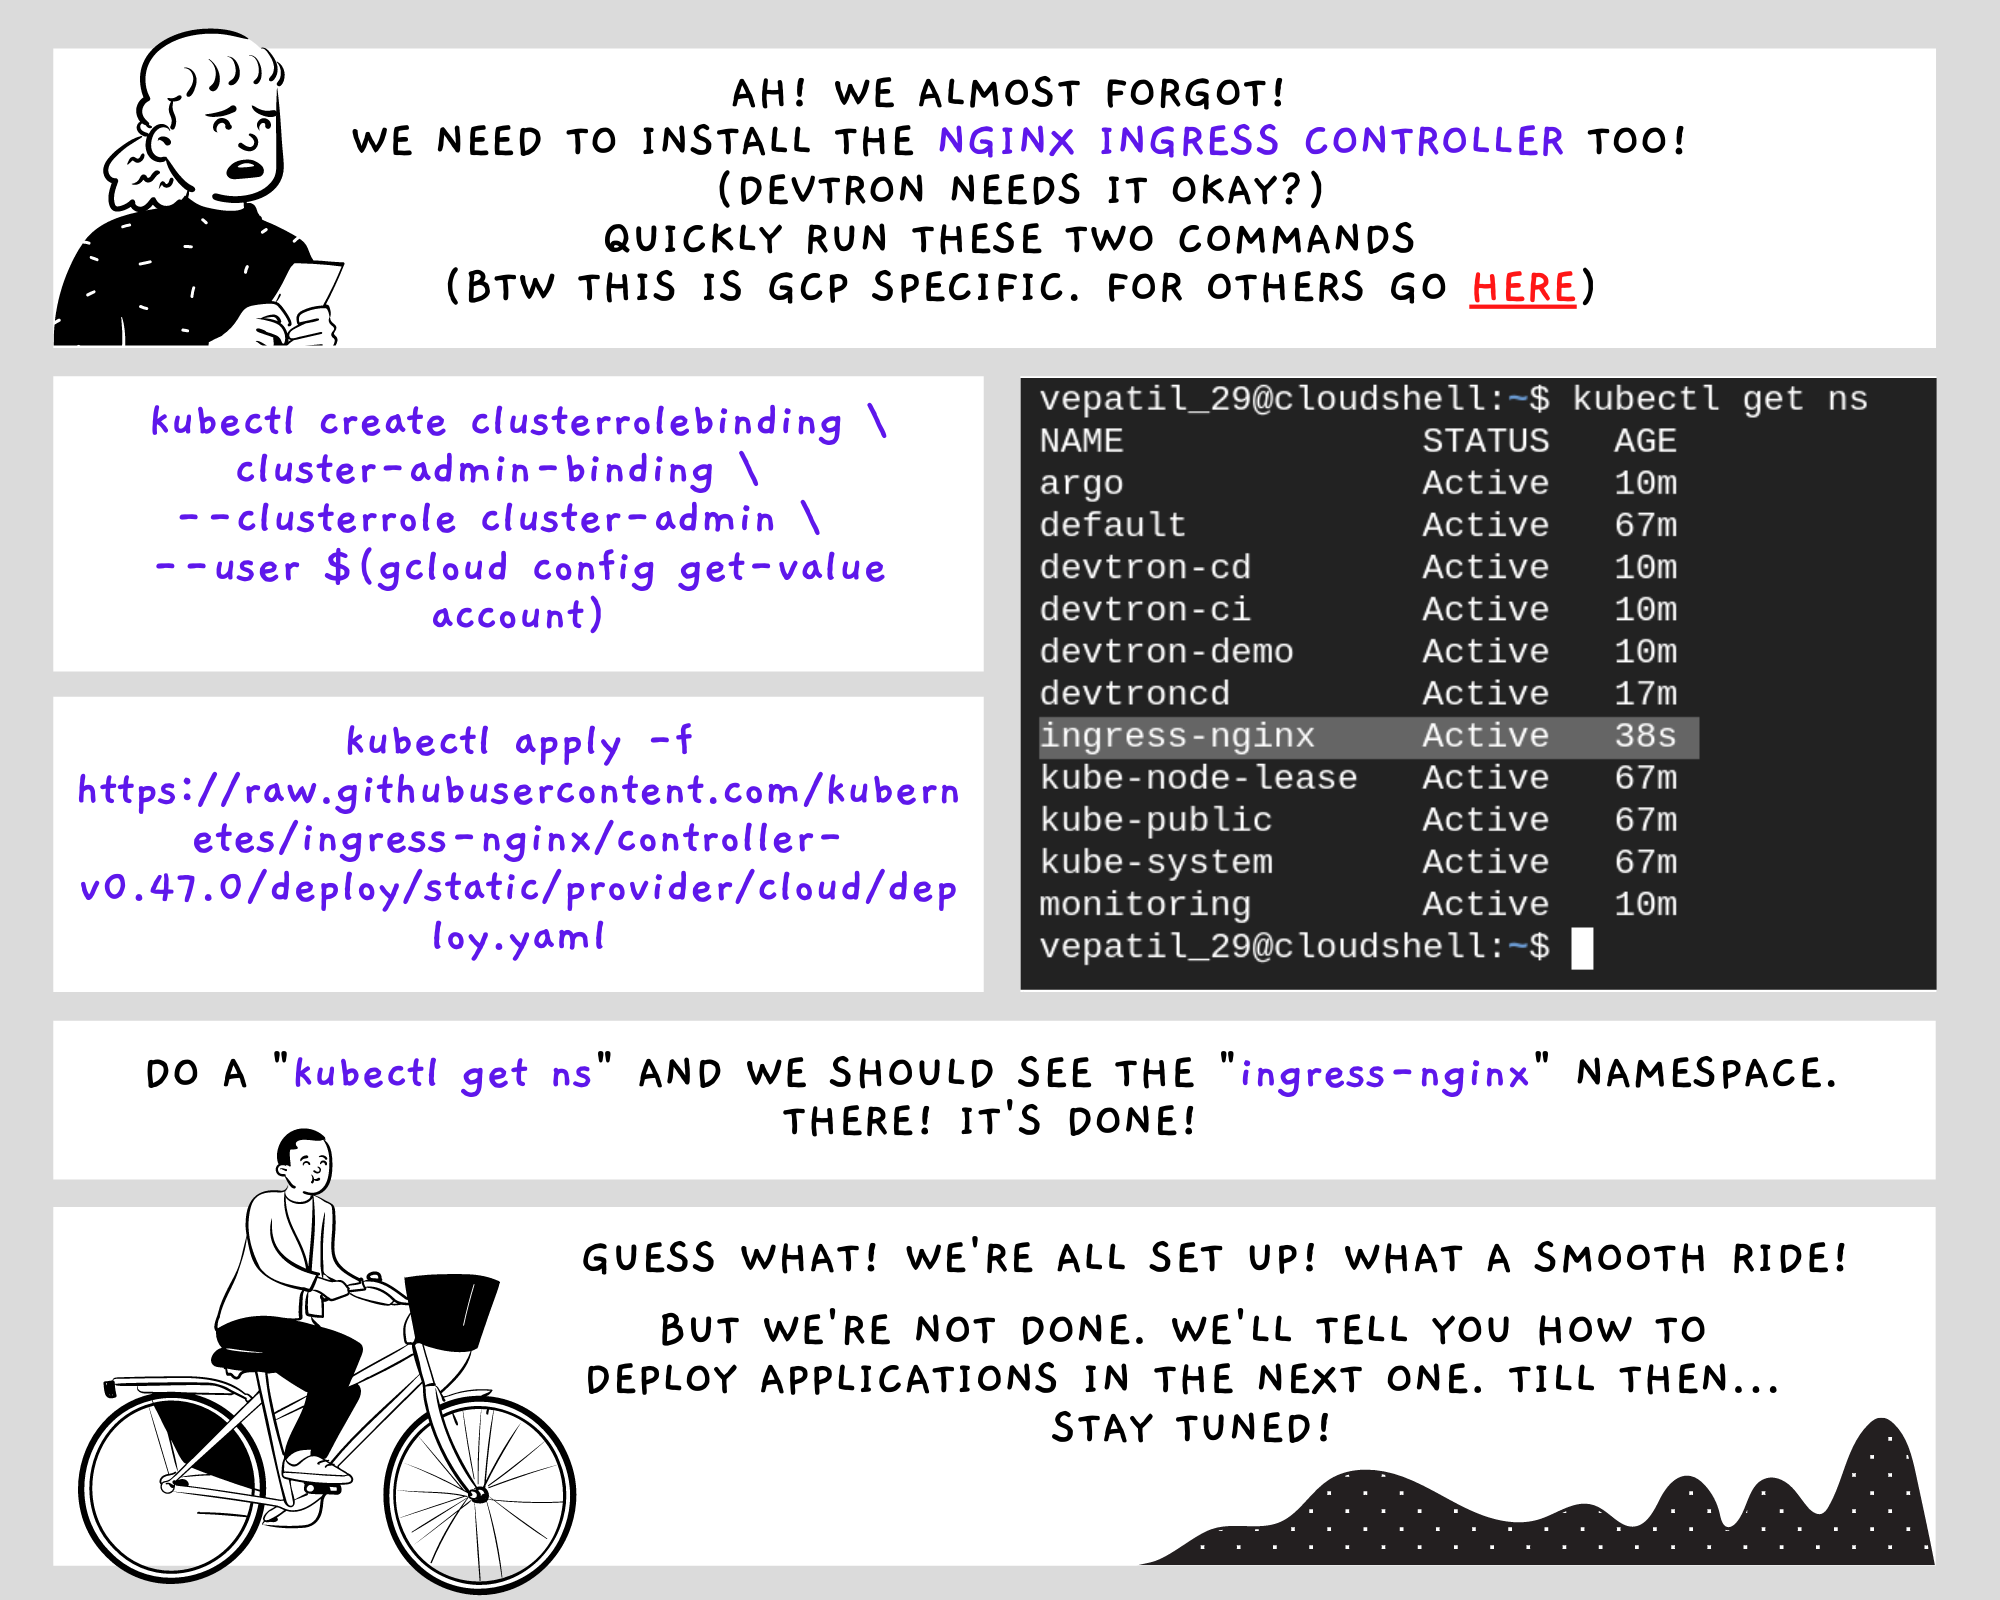
To install Nginx Controller on GCP, run these two commands:
 kubectl wait --namespace ingress-nginx \
  --for=condition=ready pod \
  --selector=app.kubernetes.io/component=controller \
  --timeout=120s

kubectl apply -f https://raw.githubusercontent.com/kubernetes/ingress-nginx/controller-v0.47.0/deploy/static/provider/cloud/deploy.yaml
If you have already created a prod cluster, there's no need to install Devtron on it. But do make sure to install the Nginx Ingress Controller on it
What's Next?
That's it! We're all set! Now comes the main part. Deploying! But we're going to tackle that in our next post (It's going to be a long one folks!) So take a quick break and then head over to our next post Kickstart with Devtron III: Deploy!
References




Join the conversation