
ko is a simple, fast container image builder for Go applications. It's ideal for use cases where your image contains a single Go application without any/many dependencies on the OS base image (e.g., no cgo, no OS package dependencies).
Case : Vicky is a Golang developer with no understanding of Docker but still wants to build, test and deploy Go applications in the swiftest possible way with a lightweight CI/CD without docker installed on his local machine.
Well, Google came up with an amazing solution named KO. Let's see how Vicky can use KO and deploy a go application in a Kubernetes cluster.
Why KO?
Let's look at the current problems that a developer faces:
- Maintaining Dockerfiles and managing Kubernetes clusters is a tedious job for an application developer.
- Build times are huge and deploying the source code in a distributed environment consumes time.
To solve the above problems, Google open-sourced Ko which is an open-source tool for building and deploying GOLang applications to a cluster-based environment.
Ko helps in:
- Building Distroless images from source code in a much easier and straightforward way without any other bulky add-ons like a shell for a Linux distributable image.
- Pushing of container images to public or private container registries configured by the Application developer without writing a dockerfile or installing docker.
Note: All the above containerization with no to minimal configuration, but one should have a Kube-cluster environment running on the machine to use KO to the fullest of its potential (If you haven’t set up the Kubernetes cluster on your local you should watch our tutorials for doing so).
Lets get into the code now and deploy a service at a brisk pace with minimalist configuration and modifications.
Installation:
brew install ko

OR

go install github.com/google/ko@latestConfigure a Registry
To set a registry that needs to be used set the KO_DOCKER_REPO variable as follows:
export KO_DOCKER_REPO=gcr.io/triggermeshNote: you can even set up a local docker registry if you want to.
Basic Commands to Start
ko publish ./cmd/app ko resolve -f deployment.yamlresolve will instruct ko to:
- scan the YAML file(s) for values with the
ko://prefix, - for each unique
ko://-prefixed string, executeko publish <importpath>to build and push an image, - replace
ko://-prefixed string(s) in the input YAML with the fully-specified image reference of the built image(s), for example:
spec:
  containers:
    - name: my-app
      image: registry.example.com/github.com/my-user/my-repo/cmd/app@sha256:deadb33f...
4. Print the resulting resolved YAML to stdout.
ko apply -f config/This is parallel to kubectl apply and allows to push and redeploy containers to the cluster.
Enough chatter let’s get cracking. The Source can be found here
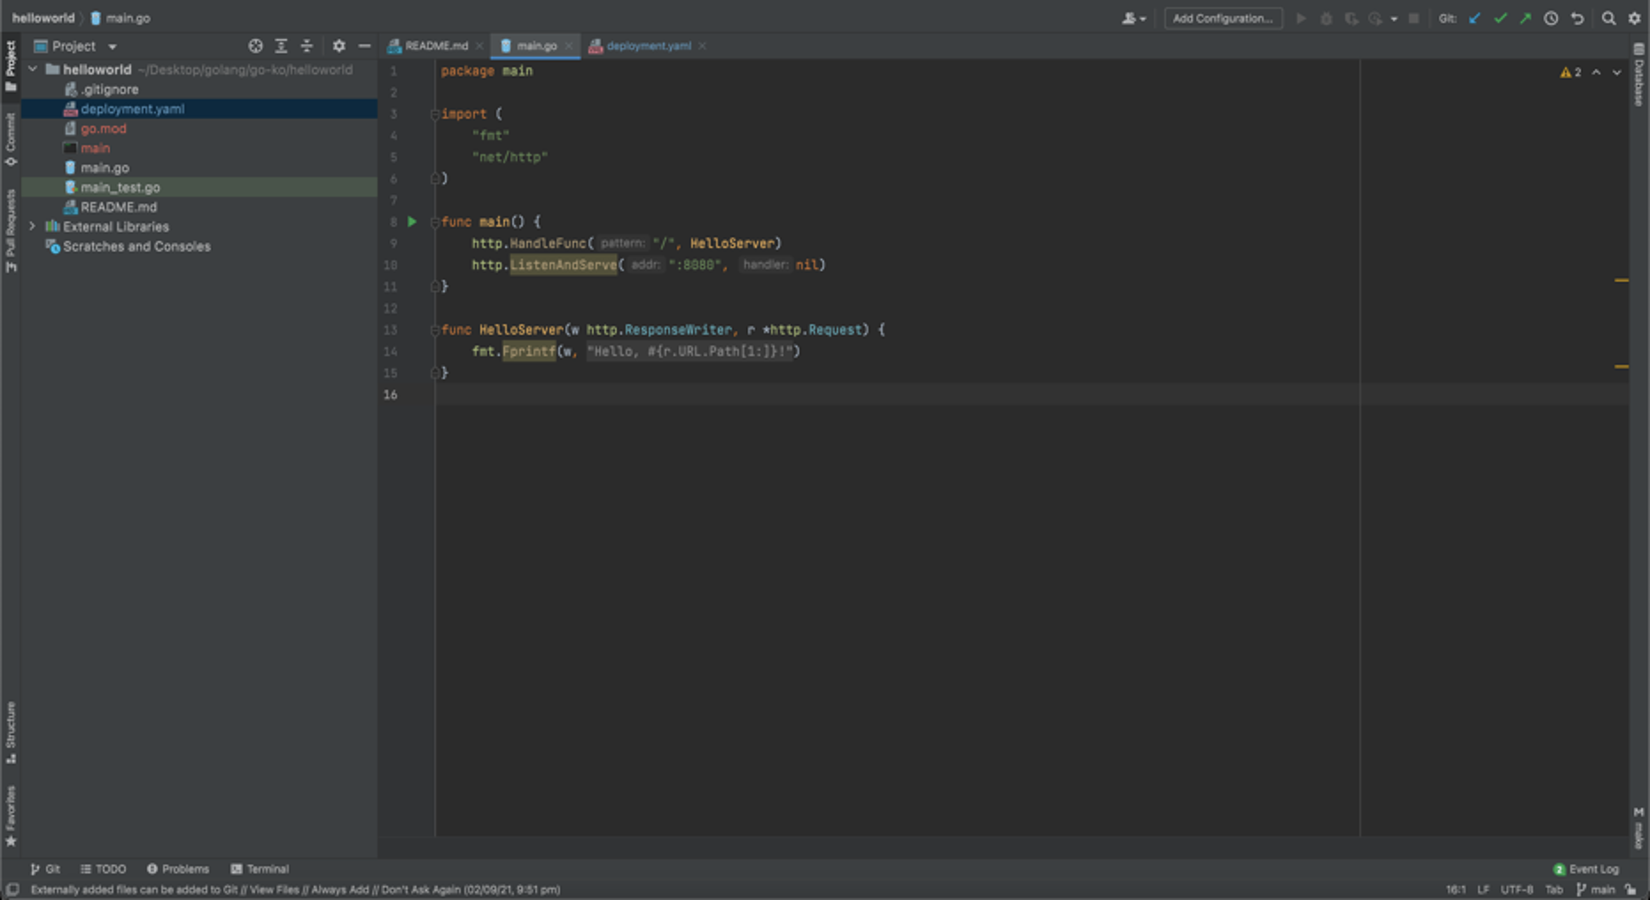
- Create a normal go project – a classical Hello World Service
2. Ensure you do a docker login for this session in your terminal
3. Export an environment variable in the name of KO_DOCKER_REPO:
export KO_DOCKER_REPO=docker.io/{your-username}4. Ensure go mod is enabled on the Hello World project – if you are not aware of how to enable go modules in your existing project then head back to our tutorial

5. Now, let’s hit a KO PUBLISH from the working directory of your project
ko publish .
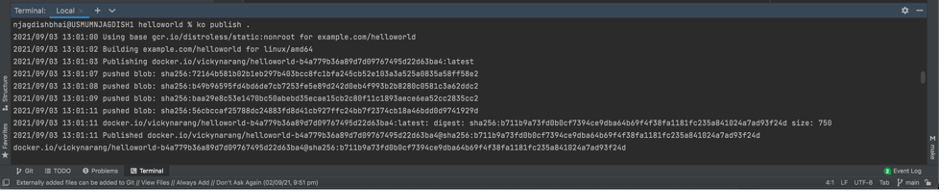
You have a Go app containerized and published to a docker registry without using Docker!!!!
Bonus Step:
Let’s go one step deeper and reduce the burden of an application developer by not plugging in the CI/CD terminologies.
Let’s go ahead and DEPLOY the GO application to a Kubernetes cluster!
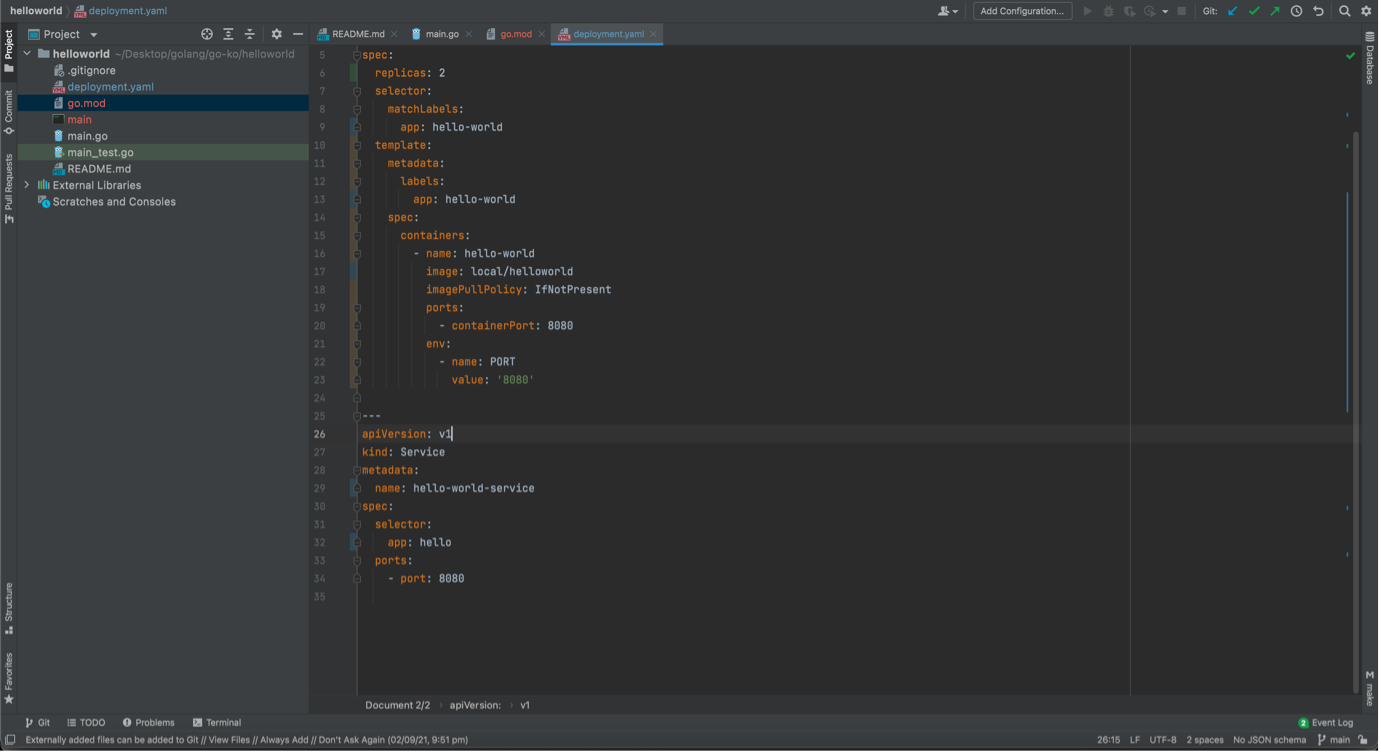
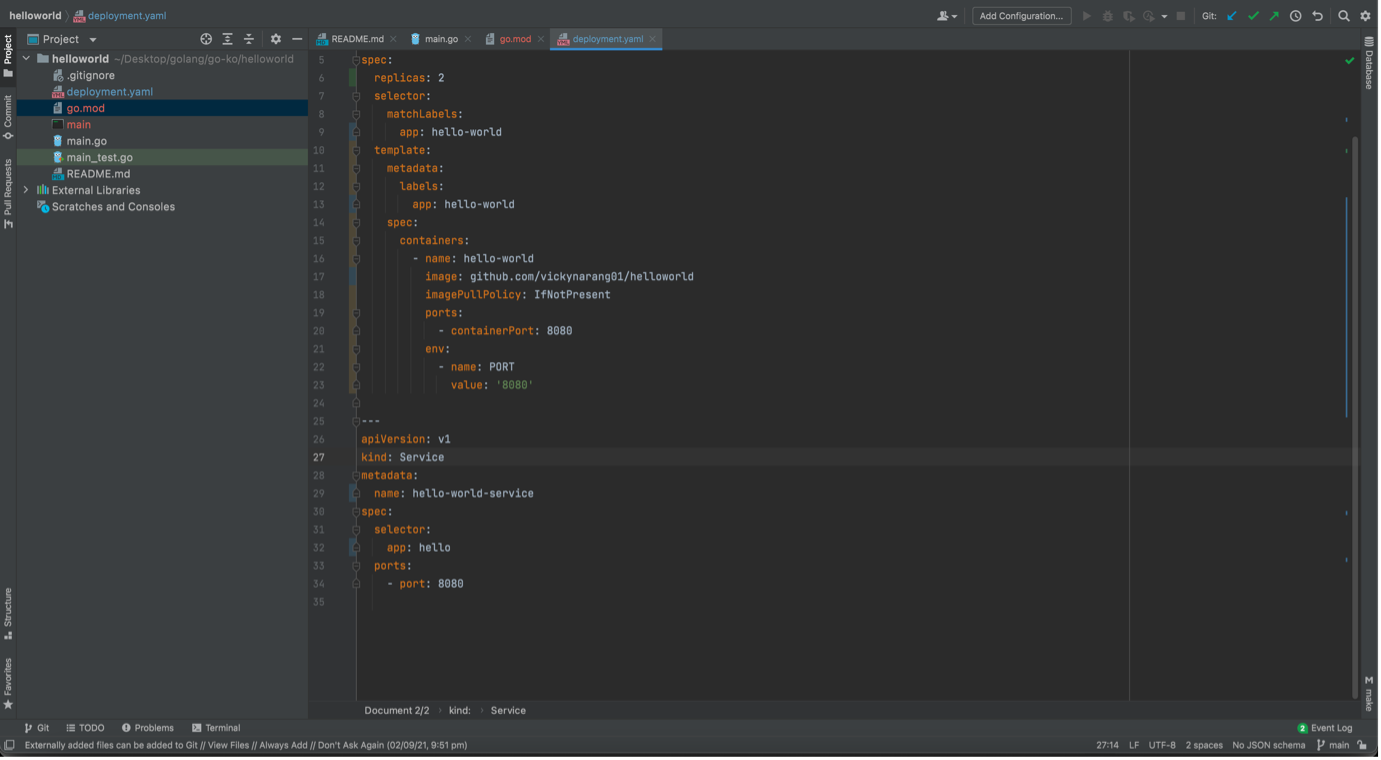
- Don’t worry, you don’t have to really look beyond creating the already existing deployment YAML files sitting in your project directory (hoping you have a separate deployment team, if not chug along with our Sample file 😀)
2. Assuming a Kubernetes environment(k8s) or a minikube cluster(k3s) running healthy on your system- if you are not aware of how to bring up a Kube-cluster on your machine then head back to our tutorial
3. A one-liner change in your deployment file should be the only modification you make in order to deploy it to the Kubernetes cluster, namely the image in the spec: label should be the one pointing to your GitHub repository from where the project is imported, these are primarily known as import paths in GOLang
4. Once the modification is done a ko resolve should prompt the updated import paths mentioned for the GOLang application to be built from
ko resolve -f deployment.yaml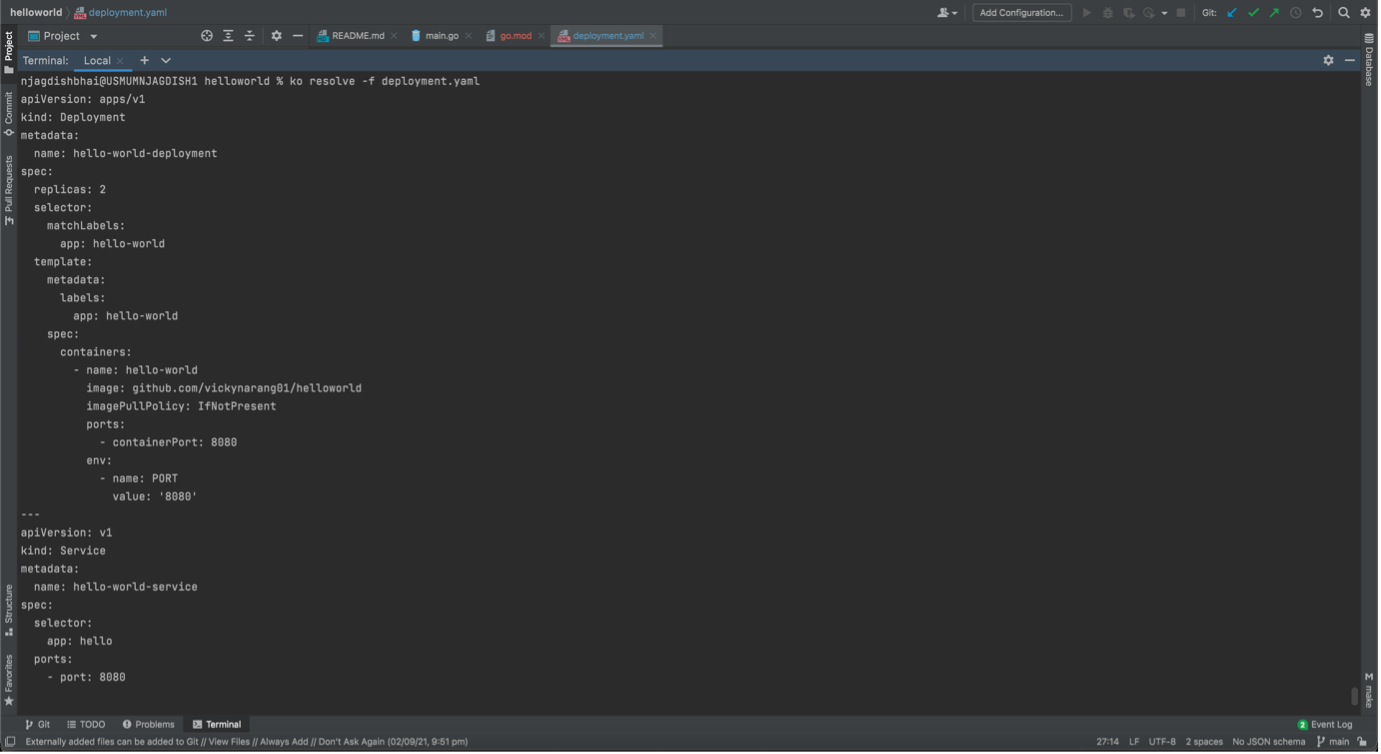
5. Lastly fire the apply command to see the application deployed on the k8s cluster
ko apply -f deployment.yaml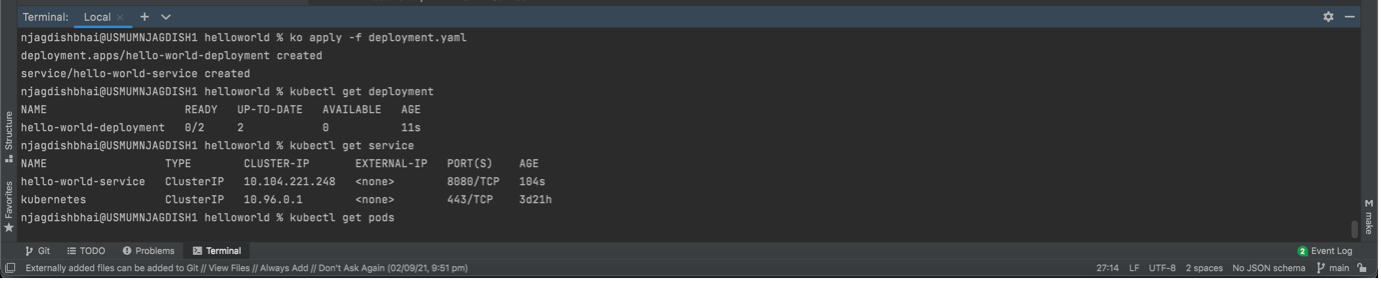
By doing a couple of modifications in your existing deployment files and setting up environment variables an application developer can deploy containerized GO application to a Kubernetes cluster with KO.
The source code for the above example can be found here.
Ko is a tool built by the Google team which helps teams working on high velocity.
For additional information on KO please visit the links below.
References:
https://github.com/google/ko
https://golangrepo.com/repo/google-ko#configuration
https://cloud.google.com/blog/topics/developers-practitioners/ship-your-go-applications-faster-cloud-run-k

Join the conversation