

Discover how Kubernetes and vclusters go hand in hand when it comes to incorporating multi tenancy . This. post is a step by step guide to deploy a simple API for multiple tenants on the same Kubernetes cluster keeping isolation in check. All using vcluster magic! Really its so simple!
We started talking about multi-tenant architectures in our previous post. We have the basics in place on the what, how, when, and where of the concept and we really hope we were able to help you get an understanding of the concept from a bird's eye view. (Still haven't read our previous post? Do it now you need it!! You can find it here)
Next, we talked a bit about vclusters. Of course, it's a nifty way of achieving multi-tenancy but if you are left scratching your head on how to actually get started with the implementation, this is the moment. I mean the blog post!
Previously on VClusters...
A quick brush-up of what we were rambling about in the last post. A vcluster TLDR!

- A vcluster = a "virtual cluster" running on an actual Kubernetes cluster.
- How does this work?
- The virtual cluster ships with its own control plane while the worker nodes and networking belong to the underlying cluster.
- How are workloads actually scheduled and executed?
- There's this component called "syncer" that copies pods from the vcluster to the actual cluster take then goes ahead and schedules the pods on actual hardware resources (the worker nodes ).
- Why do we need to do all this? Just use a full-blown cluster right?
- Well, first, it's lightweight. Second, you get great isolation. Third, it's cost-effective.
- Each vcluster is mapped to a single namespace in the cluster. You can spin up a cluster, work on it and when you are done, you can easily pause the vcluster or even delete it by simply deleting the namespace.
Got it? I think this information is concise enough to get things going!
What are we implementing here?
We are going to keep it simple in this post. The idea here is to just warm up to the concept before we delve into more complex scenarios. (And believe me, we will be going there pretty soon! 😁)
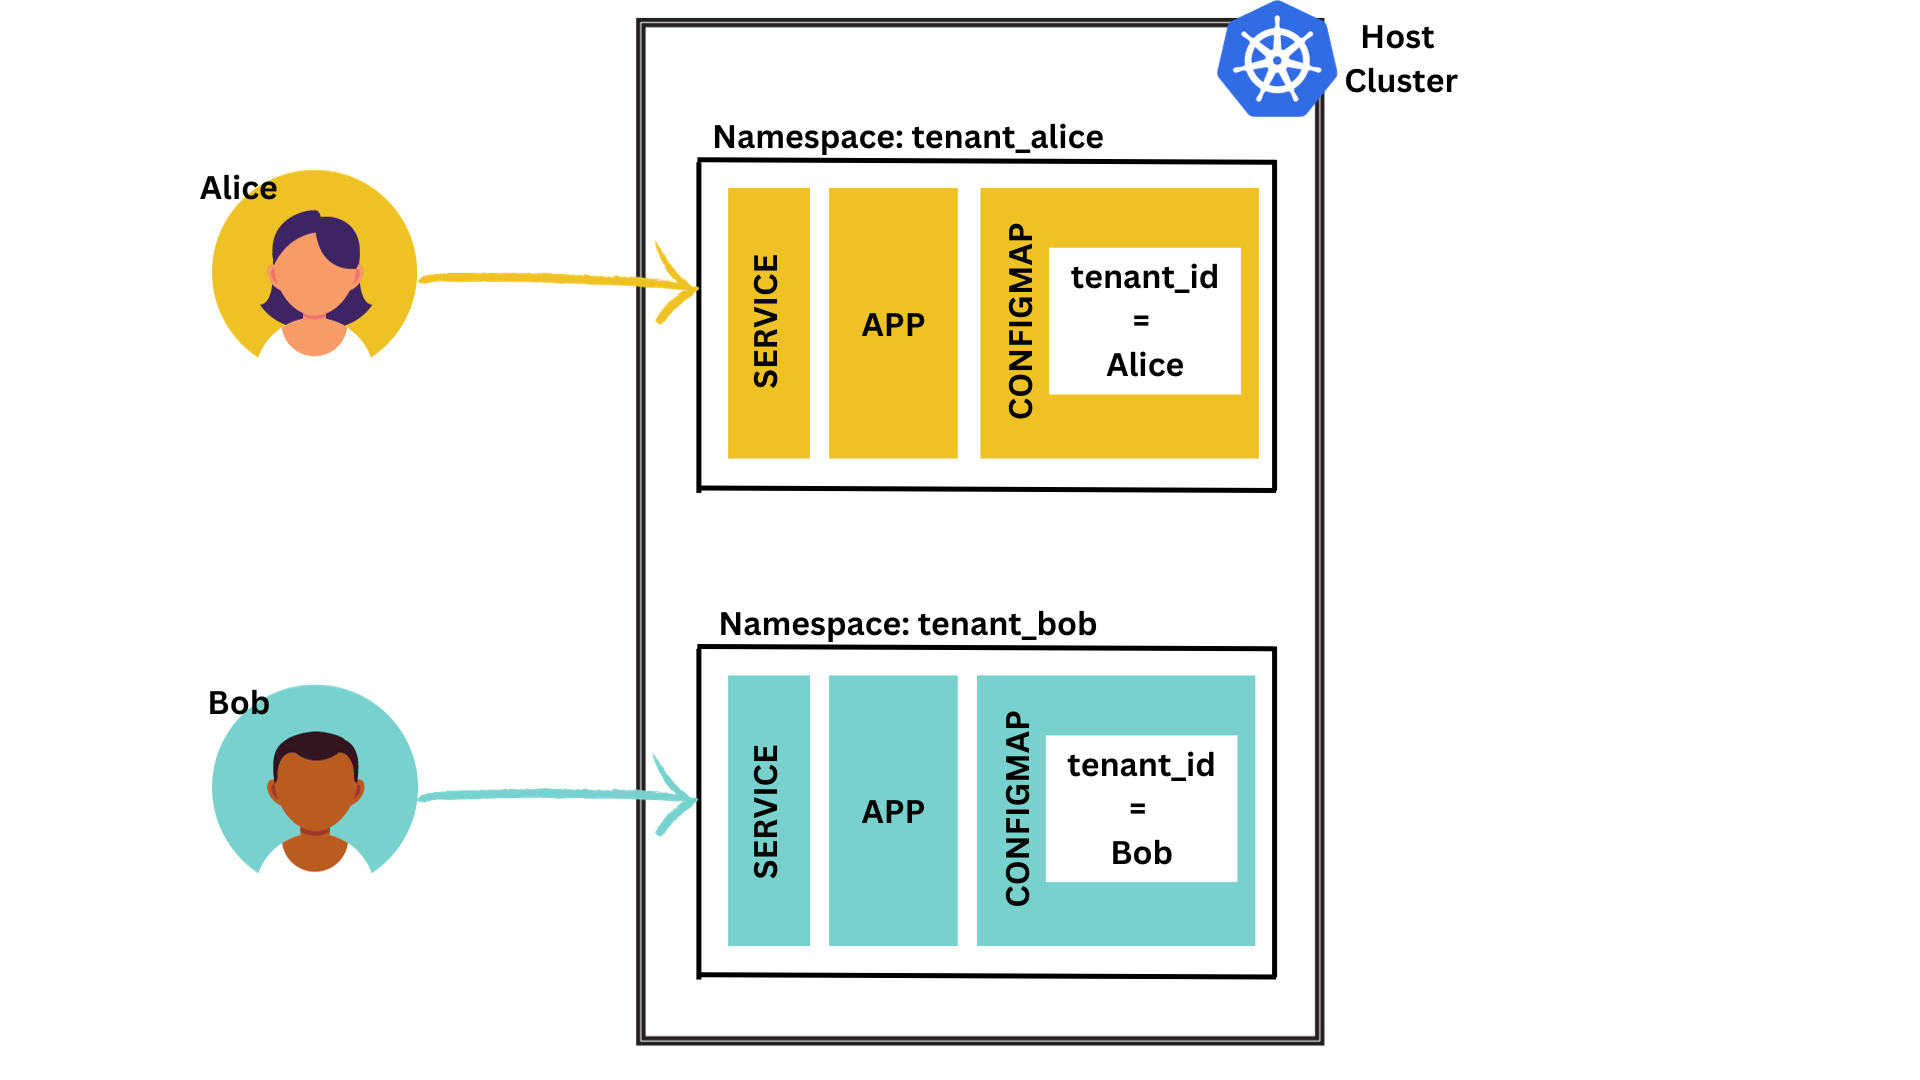
We have 2 tenants Alice and Bob that have to access a particular microservice. For simplicity's sake, imagine this is just a basic "whoami" service. There's one endpoint called "/whoami" that returns...well... who the tenant is!
The service reads the name of the tenant from an environment variable which is stored in a configmap.
We are deploying this service on a Kubernetes cluster and Alice and Bob get separate instances of the service.
Now here's what we need:
- A separate namespace for both Alice and Bob. Let's call them "tenant_alice" and "tenant_bob"
- In each namespace, we deploy:
- The whoami service
- A configmap with the tenant_id (Name of the tenant)
- A service to expose the whoami endpoint
Take a look at the picture below to get a better view:
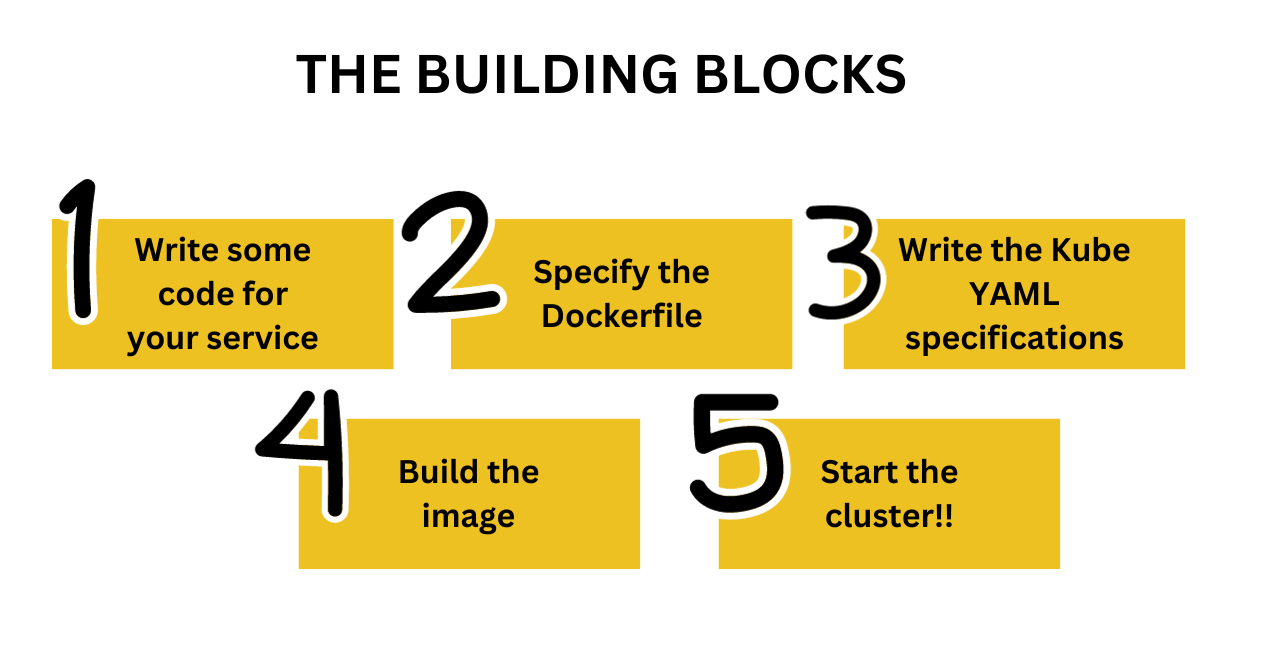
The Building Blocks.
Before we get to the cluster aspect, we need a few things in place. Let's look at these prerequisites :
- The App or microservice we are deploying
Before getting to the virtual cluster, we need to develop the microservice or the application to deploy. We are going to create a very basic Go microservice built using Fiber.
First, create a working directory and initialize it with a go module.
mkdir multi-tenant-simple && cd multi-tenant-simple
go mod init multitenantsimple
go mod tidy
Next, we write our actual application code in main.go file.
Looking at the code snippet below, you see that there is only one endpoint in the microservice with the route /whoami that sends out the name of the tenant.
package main

import (
	"fmt"
	"log"
	"os"

	"github.com/gofiber/fiber/v2"
)

func main() {
    // retrieve the tenant name via an environment variable
	tenantId := os.Getenv("TENANT_ID")
	app := fiber.New()

	// GET /whoami
	app.Get("/whoami", func(c *fiber.Ctx) error {
		msg := fmt.Sprintf("Hello there TenantID ✋ %s", tenantId)
		return c.SendString(msg) //
	})

    //run the app on port 3000
	log.Fatal(app.Listen(":3000"))
}
let's do a tidy to add in all our dependencies for the project:
go mod tidyPerfect! Next up....containerising
2. The Dockerfile to build the image for the service
We need to write a very simple Dockerfile to build the image that will be deployed eventually.
FROM golang:1.18-buster as builder
COPY . /app
WORKDIR /app
# build the binary
RUN GO111MODULE=on GOOS=linux go build -ldflags="-s -w" -o appBinary main.go
# copy the binary file the root directory
RUN cp appBinary /appBinary
# remove source code folder
RUN rm -rf /app


FROM alpine:3.14 as deploy
RUN apk add libc6-compat
COPY --from=builder /appBinary .
CMD ["./appBinary"]
After this, comes the specification files required for deployment.
3. A Kubernetes specification file
Next, to deploy the containerized application on Kubernetes, we need to create a YAML specification file. We create a "deployment" for the app and attach it to a service. Our deployment will be called "simple-app" and the service will be called "simple-service". Simple names right?
apiVersion: apps/v1
kind: Deployment
metadata:
  name: simple-app
  labels:
    app: simple-app
spec:
  replicas: 1
  selector:
    matchLabels:
      app: simple-app
  template:
    metadata:
      labels:
        app: simple-app
    spec:
      containers:
        - name: simple-app
          image: simple-app-v1
          imagePullPolicy: Never
          env:
            - name: TENANT_ID
              valueFrom:
                configMapKeyRef:
                  name: tenant-id
                  key: TENANT_ID
          ports:
            - containerPort: 3000
---
apiVersion: v1
kind: Service
metadata:
  name: simple-service
spec:
  selector:
    app: simple-app
  type: NodePort
  ports:
  - protocol: TCP
    port: 3000
    targetPort: 3000
Note that we are using a service of type NodePort
In the end, this is how the working folder looks like:
multi-tenant-simple/
    |----- main.go
    |----- Dockerfile
    |----- deployment.yaml
    |----- go.mod
    |----- go.sum
4. Build the Docker image and start the cluster
Now we all know that this is the "let's keep it simple post". So we keep our deployments local. As in we use good old minikube to spin up a Kubernetes cluster on our local machine.
And to deploy we need a containerized image. Let's have that in place first and then start a cluster
eval $(minikube docker-env)
docker build -t simple-app .
minikube start
Finally! We have all the building blocks in place. Now we are ready to bring in the vcluster mania to get this party started!
Installing kubectl might also be a good idea. You'll need it for sure!
Adding Vcluster Magic
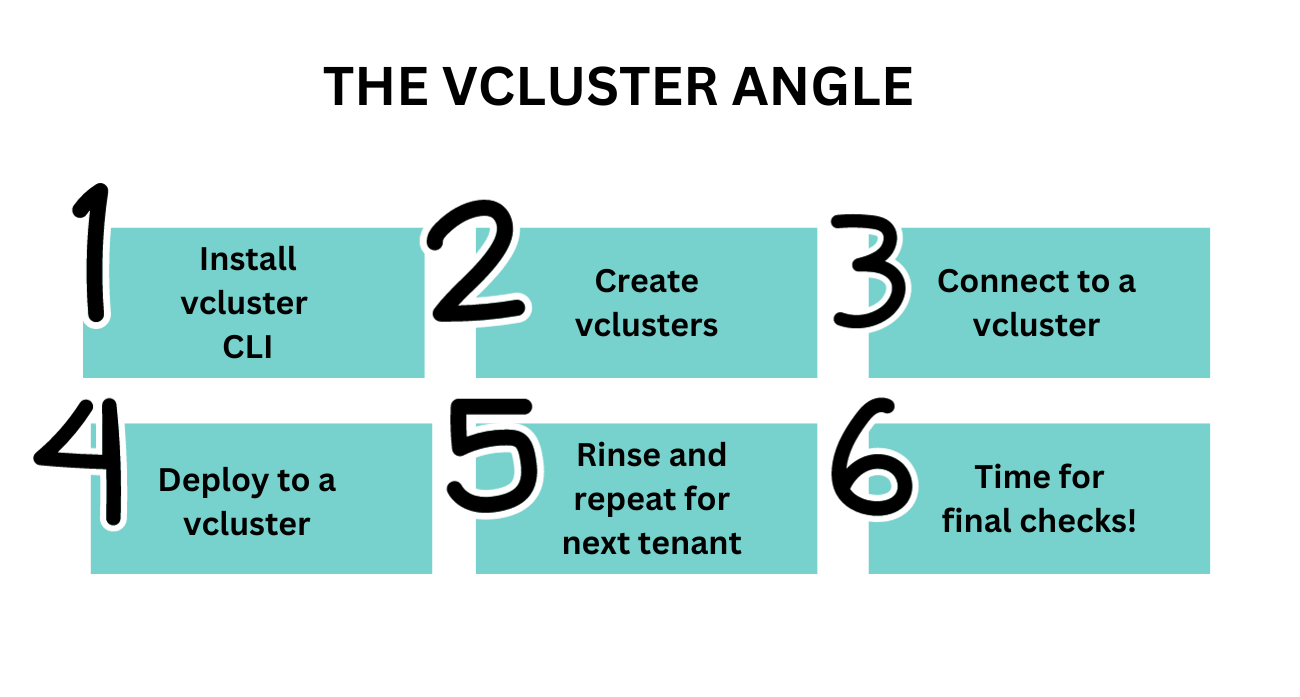
- Install
Okay. You don't obviously have vcluster on your machine. Let's get that sorted out.
We're using MacOS and brew is our go-to. But you can install the CLI based on your own OS. Refer to this link.
brew install vcluster
2. Create
Now there are 2 tenants called Alice and Bob. And for each of these two tenants, we need a vcluster (two in total). Which is as simple as:
vcluster create tenant-alice
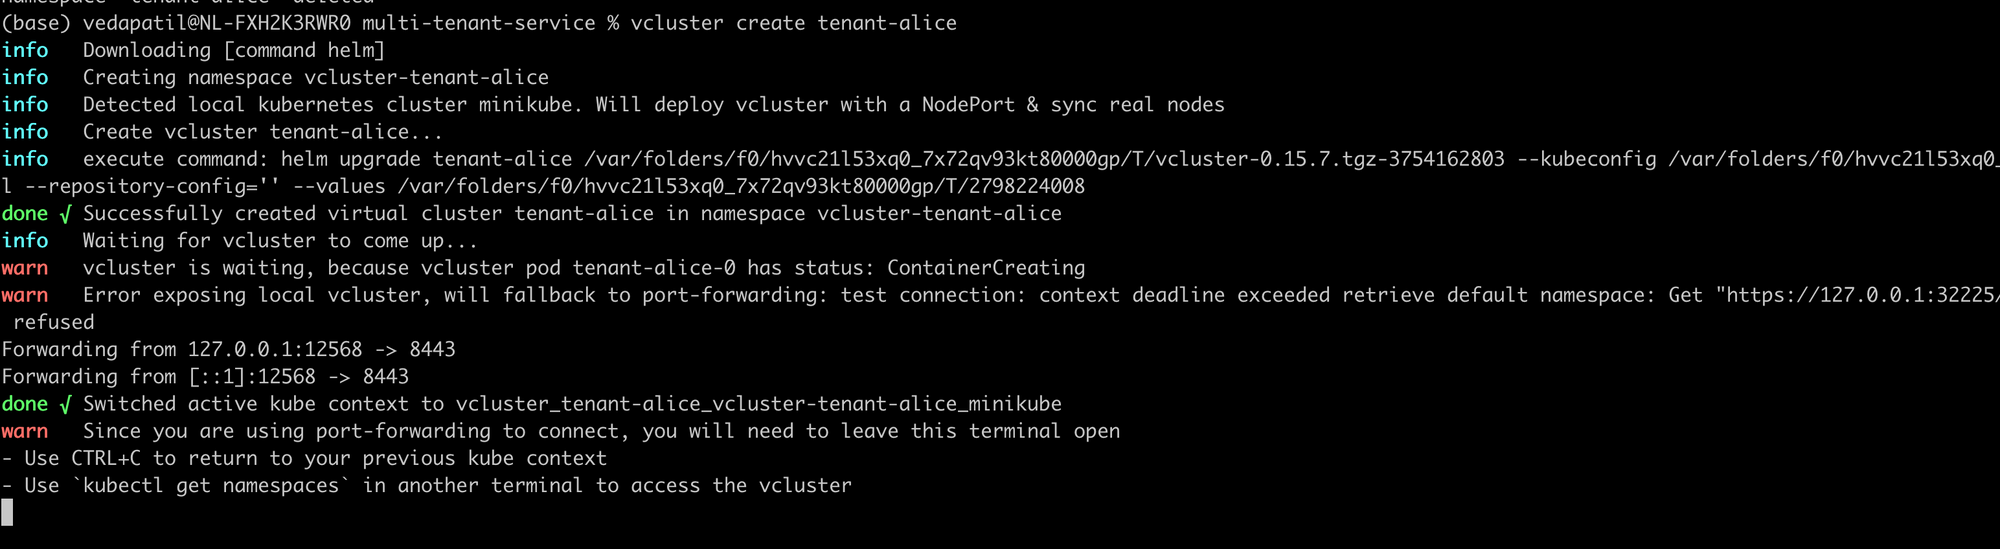
vcluster create tenant-bob
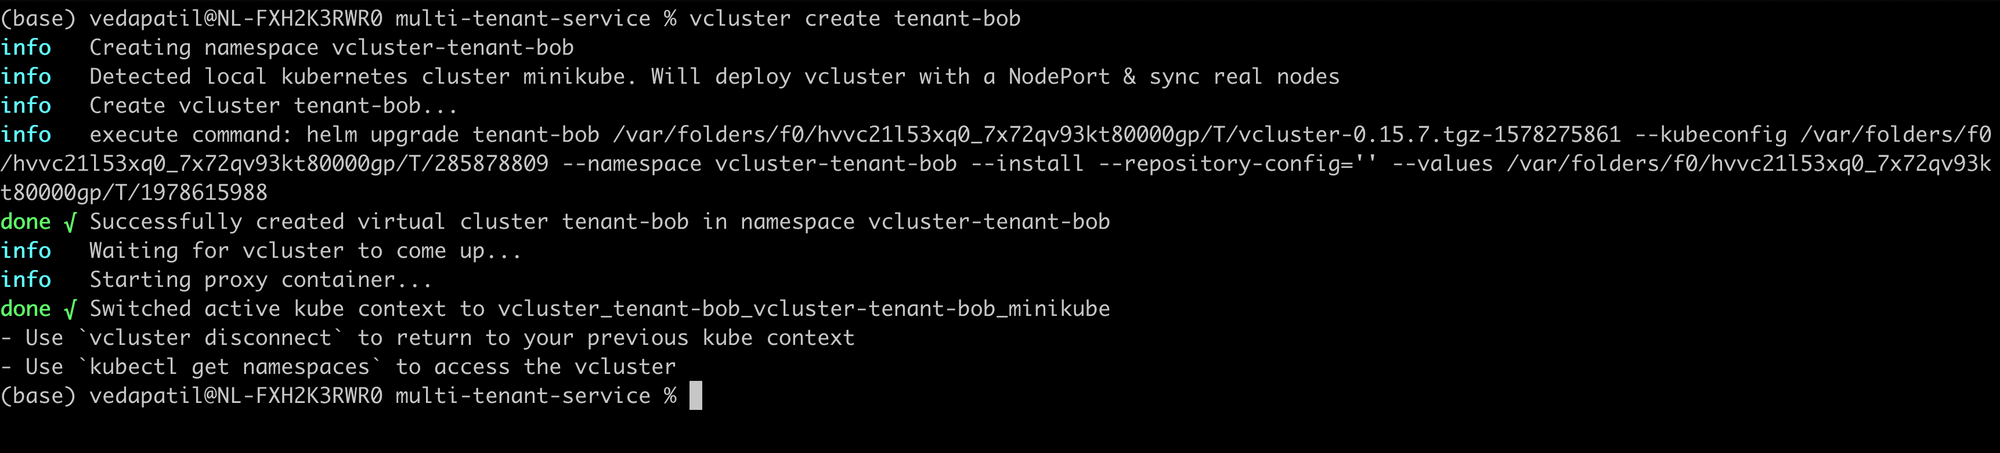
The vcluster create [tenant_id] command will spin up a virtual cluster for you in a newly created namespace called vcluster-[tenant_id] . Then, it sets up the control plane for the virtual cluster and syncs with the host cluster (your local cluster in this case). You can take a look at your vclusters using:
vcluster list

With the list command, you also get a good overview of the status of the vclusters, their namespaces, and which particular vcluster you are connected to.
3. Connect...
When you run a vcluster create you also are connected to the newly created vlcuster by default. But if you want to be explicit about it then you can run a vcluster connect [NAME].
Let's connect to the vlcuster tenant-alice first:
vcluster connect tenant-alice
Now you are working on the vcluster "tenant-alice". If you still aren't convinced, and you want to be extra sure, you can always do a quick sanity check by running
kubectl config view --minify
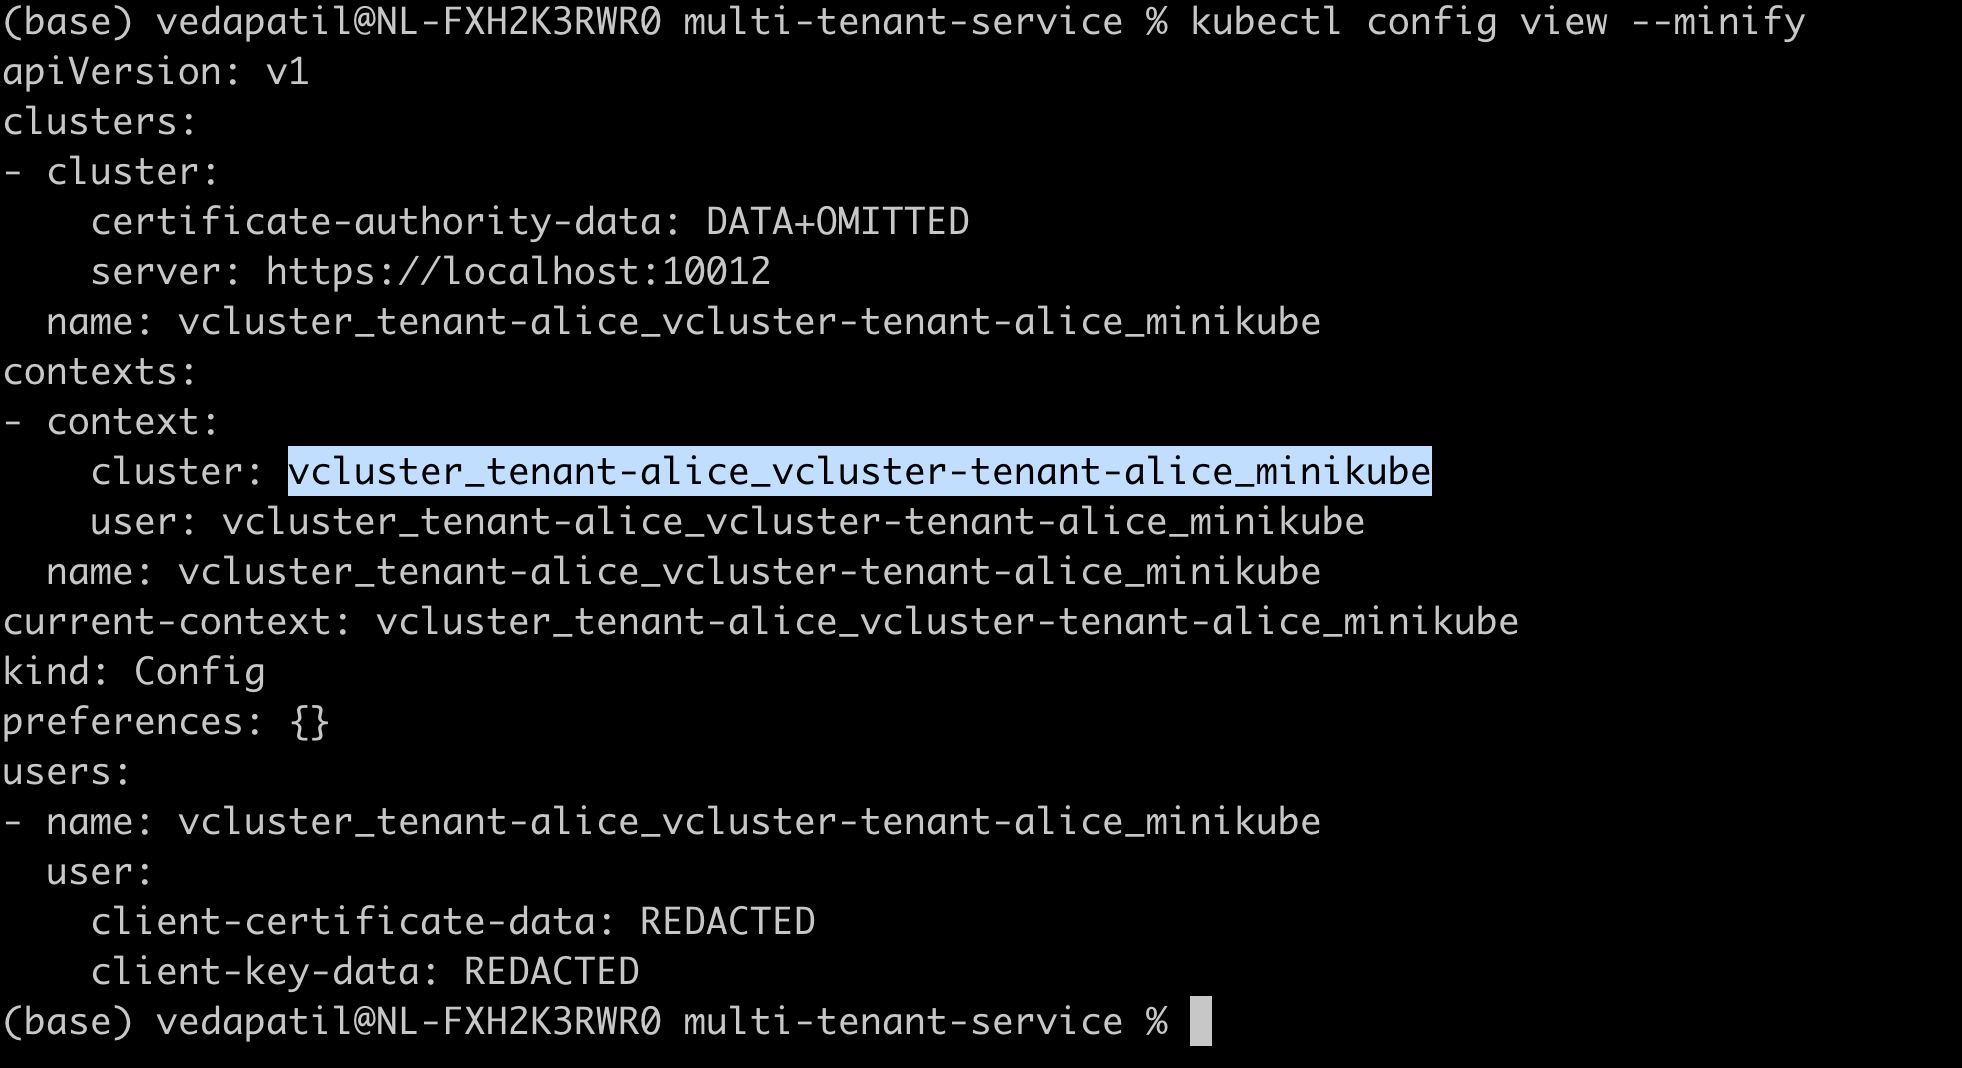
See the current cluster under the kubectl context? it's the right one!
Let's maybe wrap our heads around this a bit. You are on a cluster called "tenant-alice". For a moment, forget that it's a virtual cluster and that you have a host cluster. Just assume that it's a fresh Kubernetes cluster that is given to you to deploy your apps.
And just for a glance, maybe try running:
kubectl get namespaces

See that? That's the standard set of namespaces that are shipped with any standard Kube cluster. This means right now you have an entire cluster to yourself called "tenant-alice". And to deploy anything on this cluster we go ahead with the classic deployment method.
I told you to forget about the host cluster. But you simply cannot! Where is the host cluster? Where is the other cluster?! Okay, let's this out.
If you disconnect from the vcluster, you automatically switch back to the host cluster. Try getting a list of namespaces now:
vcluster disconnect
kubectl get namespaces
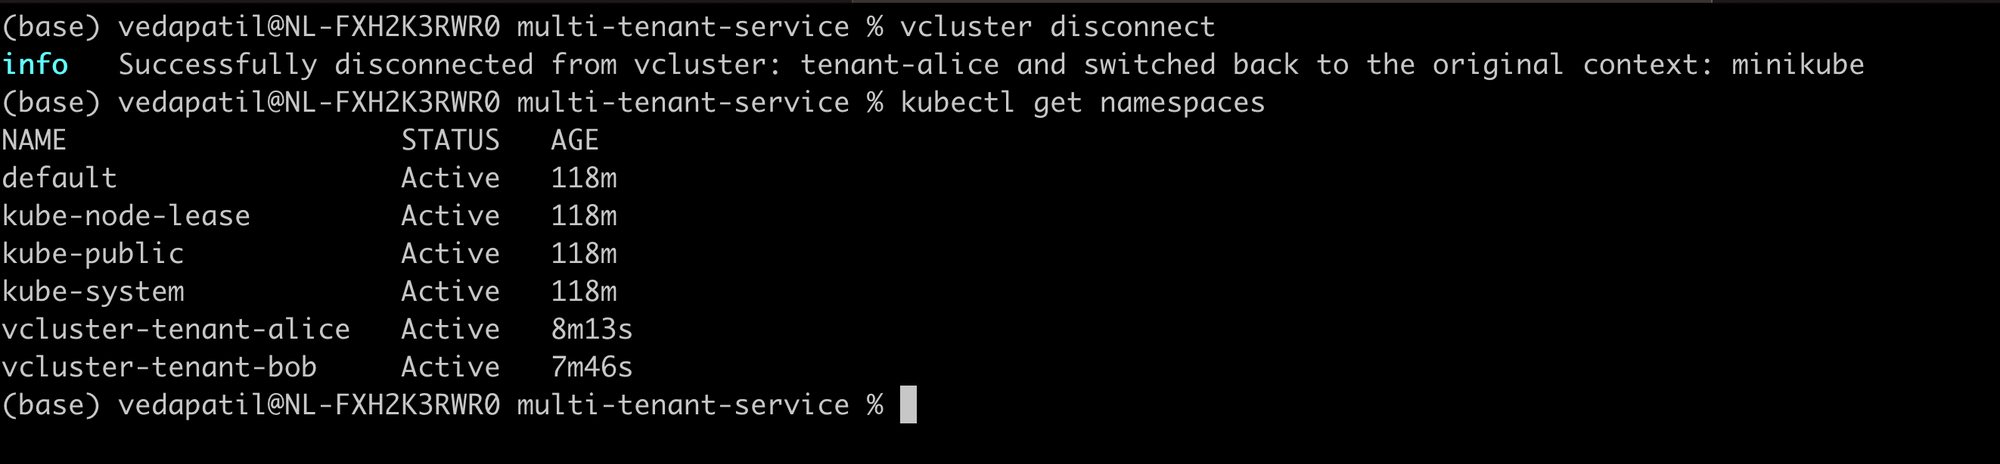
See that? you have the usual namespaces and then you have an additional namespace for tenant-alice and one for tenant-bob vcluster. This is where your clusters are running.
4. Deploy!
Time to deploy our app for tenant Alice! First, make sure you are connected to the 'tenant-alice' vcluster.
vcluster connect tenant-alice
Now we proceed with our usual deployment process. First, we create a configmap that contains the tenant_id i.e. Alice. And then deploy the app and the service using our YAML specification files.
kubectl create configmap tenant-id --from-literal=TENANT_ID=Alice.
kubectl deploy -f deployment.yaml
Then just to see if we have our deployment in place:
kubectl get deployment
kubectl get svc
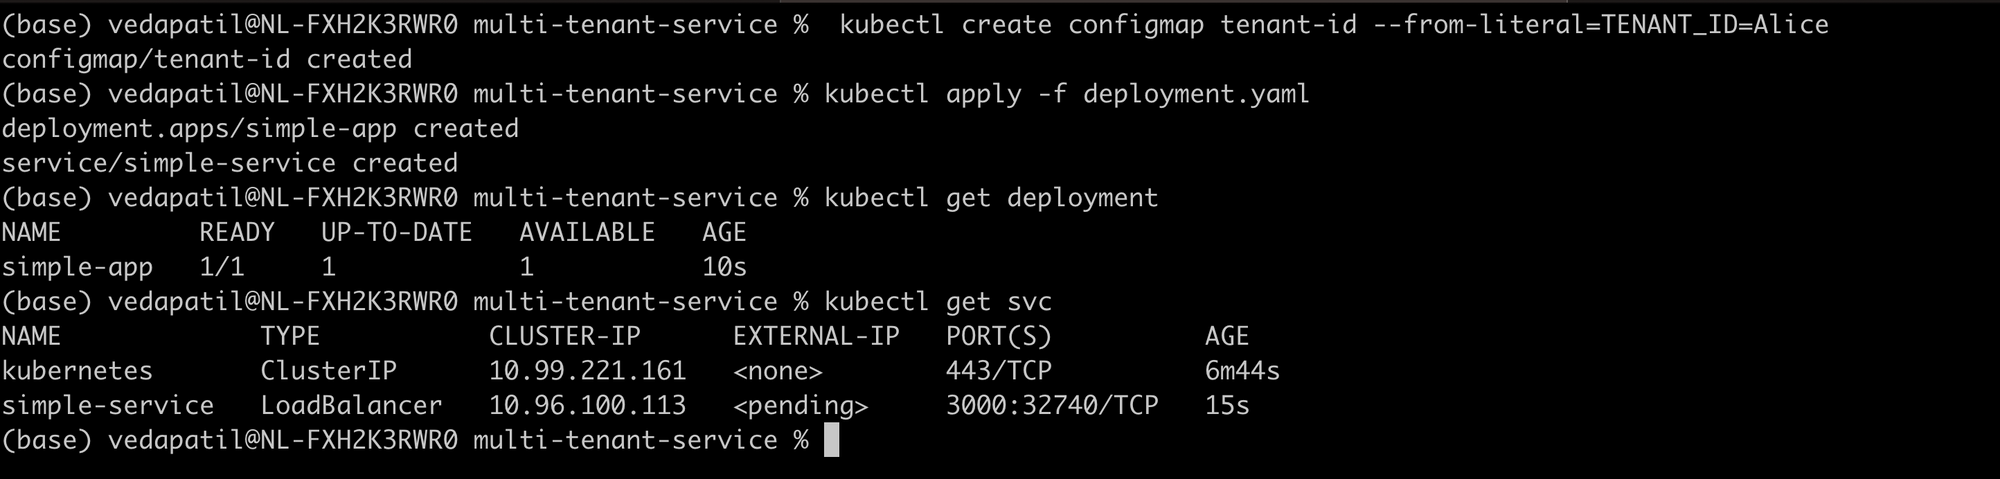
There we go!
5. Do a double check
Now, let's do something to verify if we actually have some isolation using the vclusters. First, disconnect from the vcluster and switch the context to the host cluster.
vcluster disconnect
Next, try fetching the deployments and the pods in the vcluster-tenant-alice namespace.
kubectl get deployment -n vcluster-tenant-alice
kubectl get pods -n vcluster-tenant-alice

Strange? There are no deployments in the namespace but there's a pod called 'tenant-alice-0' running...... Not strange at all.
You see, if this was a regular namespace, you would have seen the deployment in the namespace and the pods running in it. But since the namespace contains a vcluster, the deployment workload is isolated from the host cluster.
But then why do we see the pod running? That's because all pods need to be eventually scheduled on the host system. Running any sort of workload requires hardware resources which, in the end, belong to the host cluster.
In the background, the vcluster's syncer component is doing the synchronization and the scheduling of pods on the host cluster.
6. Onto the next tenant
Great Alice is done deploying! Now if we have another tenant called Bob. We can repeat the same procedure to deploy.
# Connect to the vcluster tenant-bob
vcluster connect tenant-bob

# create the config map with tenant_id = Bob
kubectl create configmap tenant-id --from-literal=TENANT_ID=Bob

# deploy the app and svc
kubectl deploy -f deployment.yaml

#disconnect from the vcluster
vcluster disconnect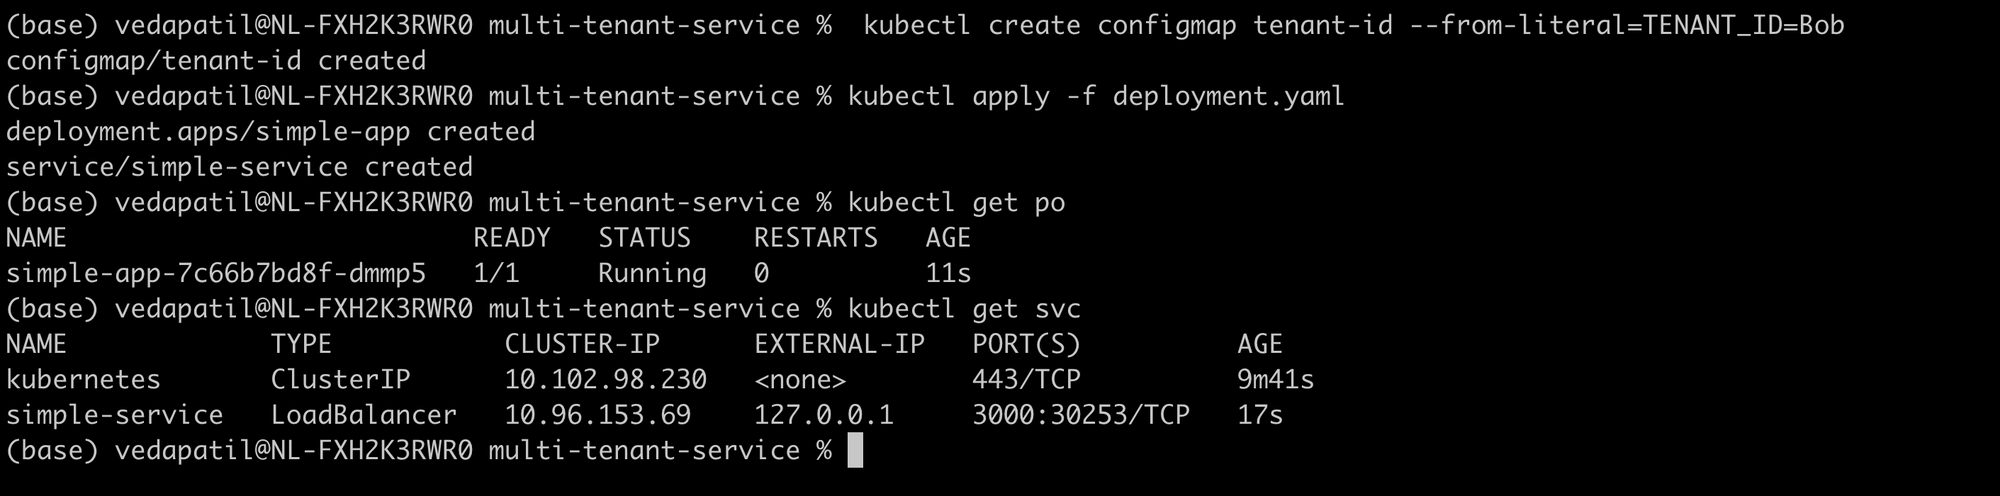
There we see the deployment and the service running for Bob too!
7. Final runs
Alright, our setup is done! We have 2 tenants isolated from each other.
How? For example, when you are working on the tenant-alice cluster, you forget about tenant-bob cluster or even the host cluster and vice versa. So imagine if both Alice and Bob are interacting with their application on their own (v)clusters at the same time, they are pretty unaware of each other. But in reality, they are using the same Kubernetes cluster.
But we need to know if our services are actually running and giving out the correct results. So maybe let's do a quick test.
We use a simple port forward on the services that we have deployed. One port-forward for tenant-alice on port 3001 and one for tenant-bob on port 3002
First, on the host cluster, fetch all the services:
kubectl get svc -A
You will find a svc "simple-service" in both the namespaces for vlcluster-tenant-alice and vcluster-tenant-bob.
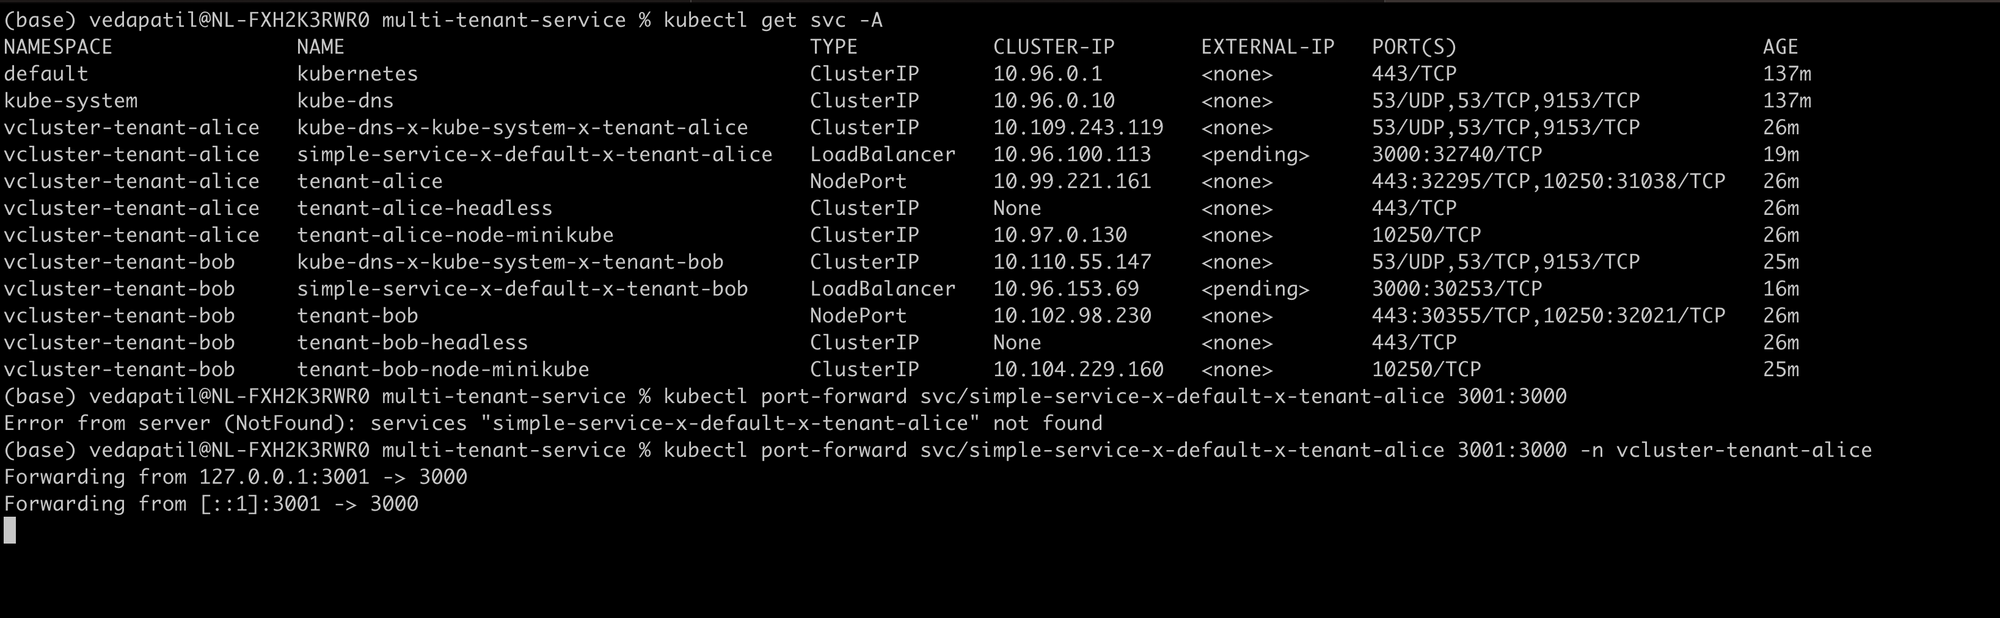
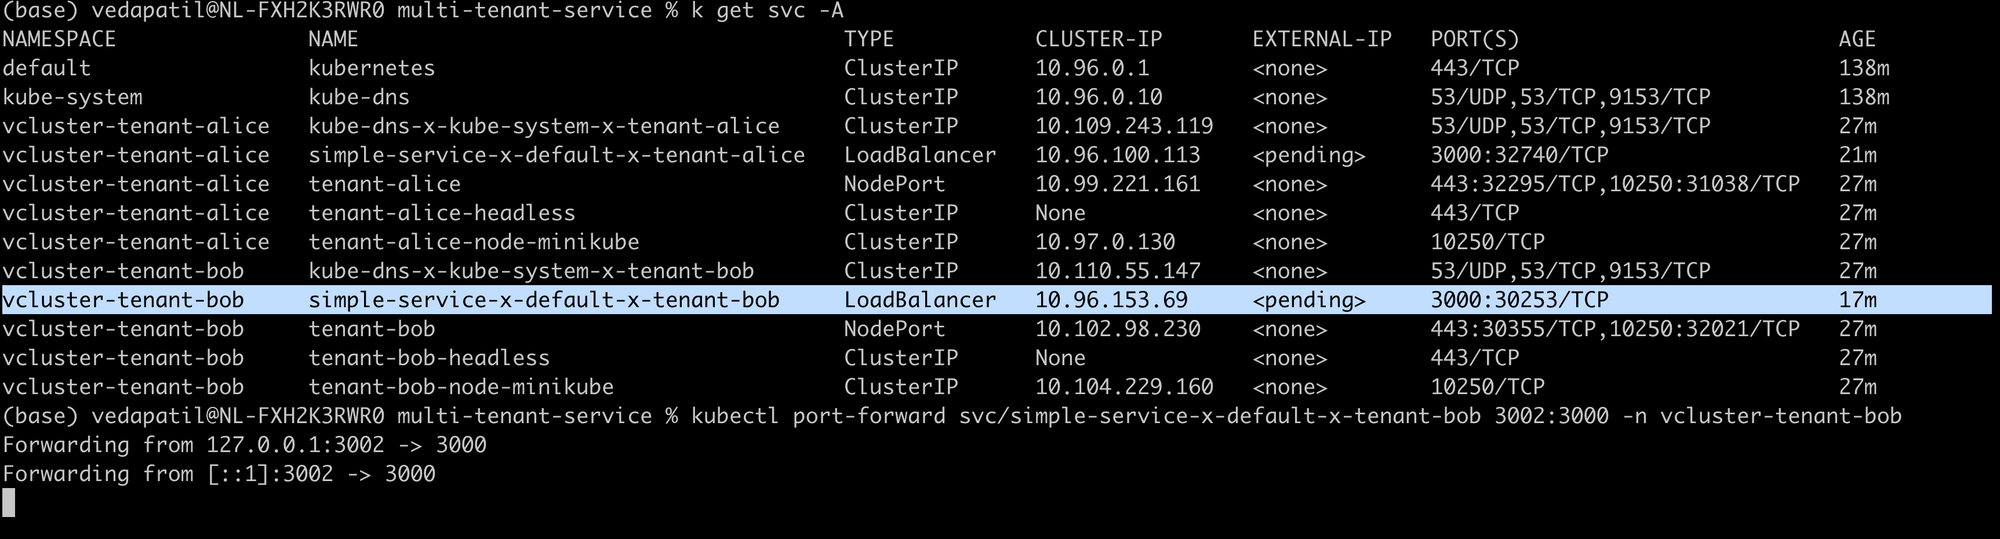
Now all you need to do is a port forward:
kubectl port-forward svc/simple-service-x-default-x-tenant-alice 3001:3000 -n vlcuster-tenant-alice
kubectl port-forward svc/simple-service-x-default-x-tenant-bob 3002:3000 -n vlcuster-tenant-bob
And finally, a quick curl command to check if you actually can reach your services:
curl localhost:3001/whoami
curl localhost:3002/whoami
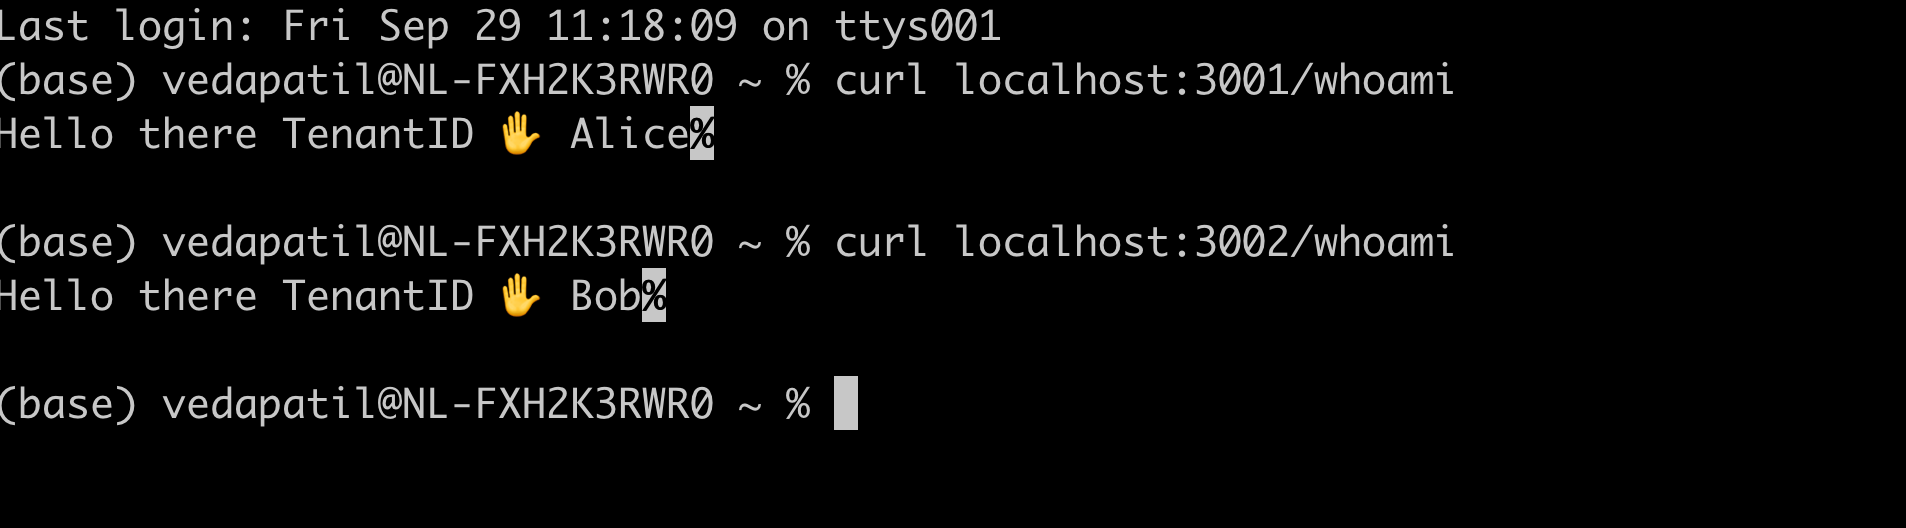
You have the same service running for two different tenants and the same service is giving you the right name of the tenant. There we go!
Extra: Take a pause on that vcluster!
Now imagine a scenario. Of course, the example we have in this post is very simple but imagine the Whoami application is something bigger and all the tenants are paying a monthly fee to get continued access to the application.
So, in this case, both tenants Alice and Bob are on a monthly subscription model. For some reason, Alice forgets to pay for a month. What would you as an administrator do? Well, let's give Alice the benefit of the doubt. Maybe she forgot or maybe she doesn't want to continue anymore. Who knows! So ideally, we pause her account and if she pays within, say, a week, we "unpause" the account. If not, then we delete her account.
How do we apply this in our example? Simple! We pause the vcluster related to tenant-alice
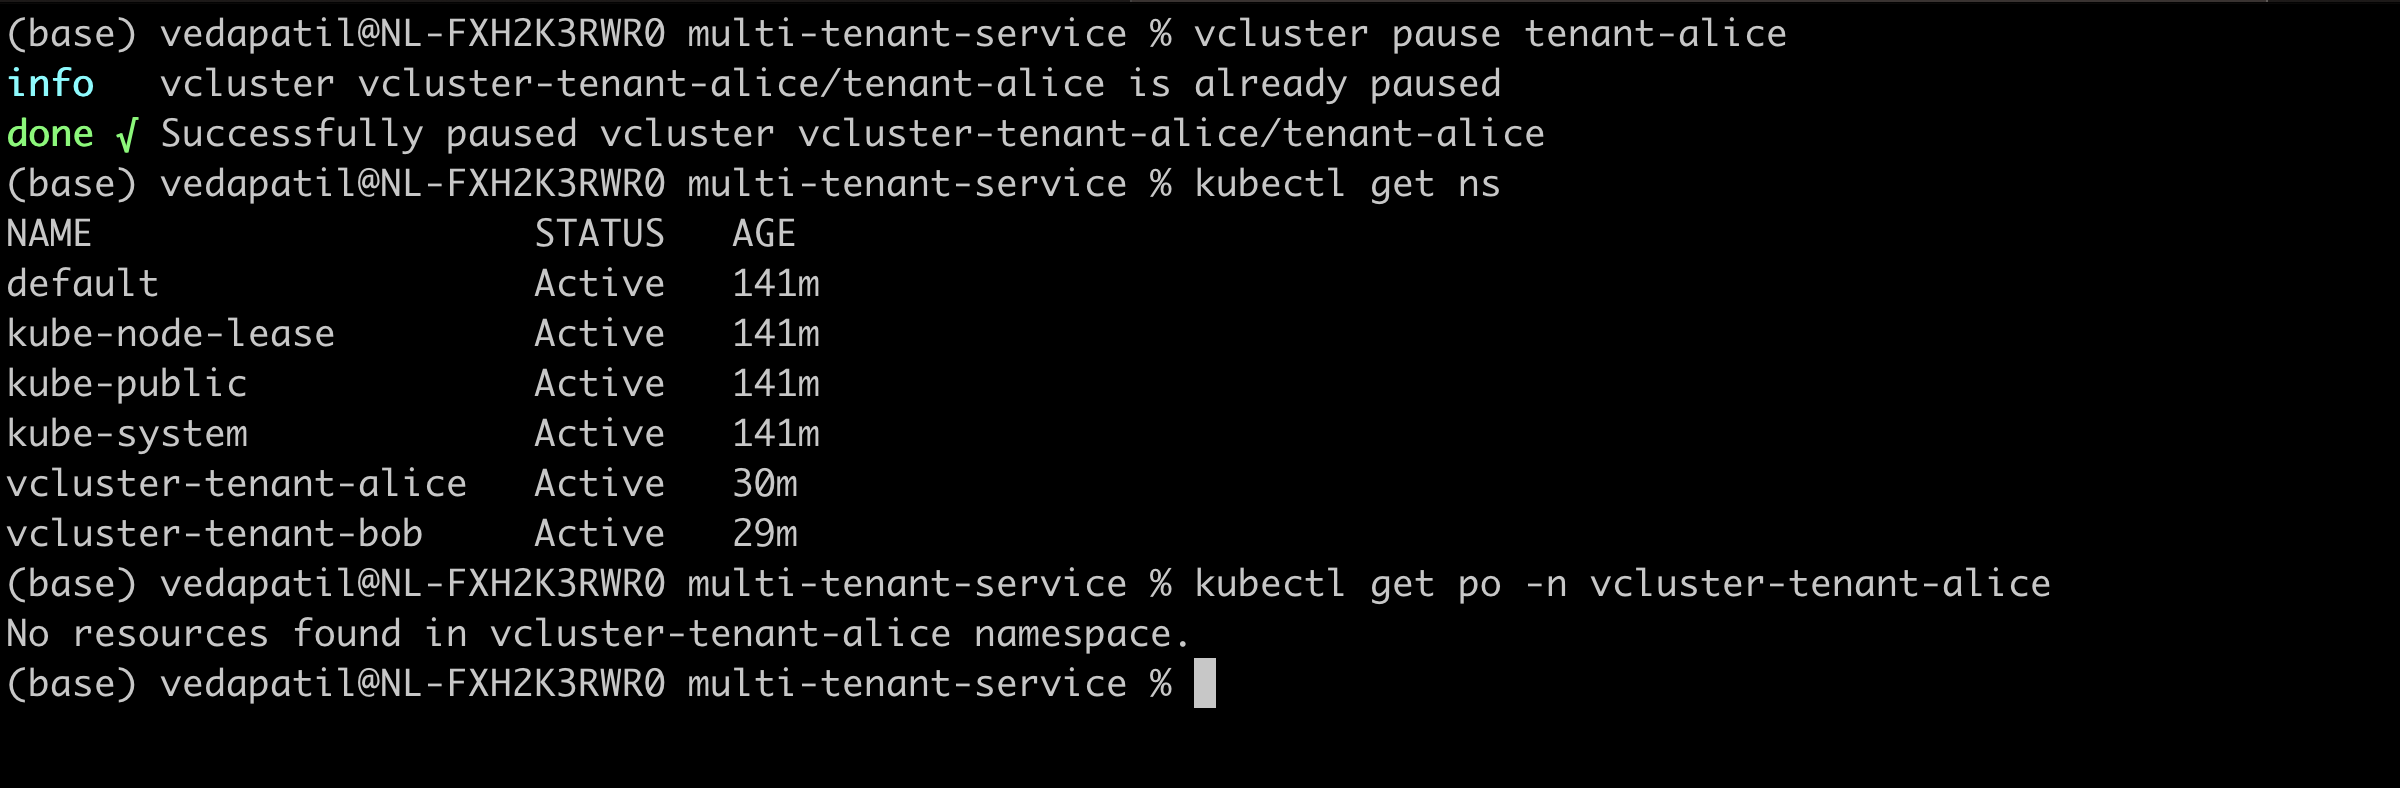
vcluster pause tenant-alice
And now, from the host cluster, if you try to list the namespaces, you still see tenant-alice. But if you try to see if there are any pods scheduled in the namespace, you see nothing! So basically, there's nothing happening there!
But, then we can resume the vcluster again and we immediately see pods running.
vcluster resume tenant-alice

It's as easy as that! Now imagine, if there was no vcluster. Is there a straightforward way to achieve this pause/resume feature? Not really? Sure, in a deployment, you can scale down the pods to zero but there are also other workloads like services, configmaps, secrets, etc to handle. Do you want to put in that much time or effort? Moreover, we already talked about how namespaces aren't the best at providing complete isolation. So clusters can actually help you out in this situation!
Conclusion
I think it's a good idea to let all that information sink in for now! Sure what we implemented in this post was super simple. But you always start simple and then move on to more convoluted problems. In the upcoming posts, we discover more facets of multi-tenancy and of course, more about virtual clusters!


Join the conversation